Looking for a simple and powerful way to display your events anywhere on your WordPress site? With The Events Calendar Shortcode & Block plugin, you can extend the functionality of The Events Calendar (by Modern Tribe) so you can control where and how your events are displayed on your site.
Using shortcodes or blocks, you can display events on any post, page, or widget. With more than 20,000 active installations, The Events Calendar Shortcode & Block is the trusted go-to WordPress plugin for The Events Calendar users looking to customize the look and feel of your events.
In this guide, we’ll cover all the available shortcodes in The Events Calendar Shortcode add-on, with plenty of examples of the shortcodes in action. You’ll see what’s possible when creating shortcodes, along with how you can make the most of what this powerful WordPress plugin has to offer.
List of Events Calendar Shortcodes Table of Contents:
- Getting Started
- The Basic Shortcode
- Filtering Options
- Display Options
- Styling and Design Options
- Custom Designs
- Wrapping Up
Getting Started
Before we dive into the shortcodes, let’s start from the beginning with a quick guide to installing The Events Calendar Shortcode and Block Pro version.
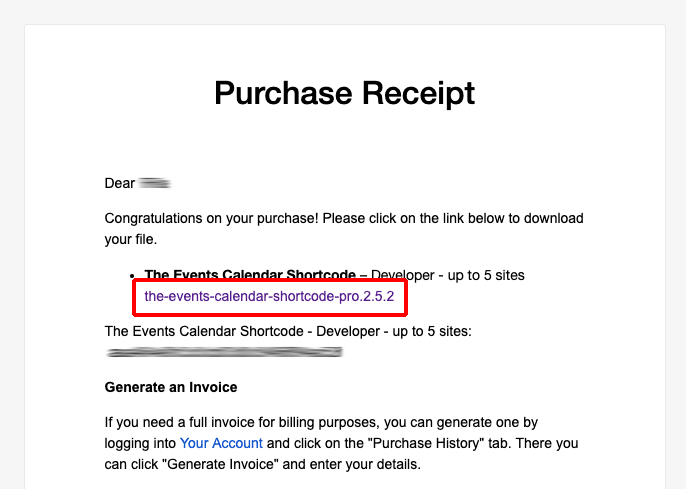
1. Download the plugin
After purchasing The Events Calendar Shortcode & Block Pro, look out for your purchase receipt in your inbox. In the email, you’ll see a link to download the plugin, so go ahead and download it.
2. Install and activate
Log into your WordPress site, go to Plugins > Add New, and upload the plugin to your site. Once installed, activate the plugin.
If you don’t already have The Events Calendar plugin installed on your site after using the free version, you’ll be prompted to install it.
The plugin will add a menu item to the sidebar. You’ll notice it at the bottom of the list of options available for The Events Calendar plugin, highlighted in orange.
And that’s it! The plugin works out of the box and there’s no configuration. You’re ready to start adding shortcodes to your site that let you customize the look and feel of your calendar events and featured events.
The Basic Shortcode
To show an event list on your site, here’s the basic shortcode:
[ecs-list-events]
To use the shortcode for your list of events, simply add it to a post, page, or widget, like so:
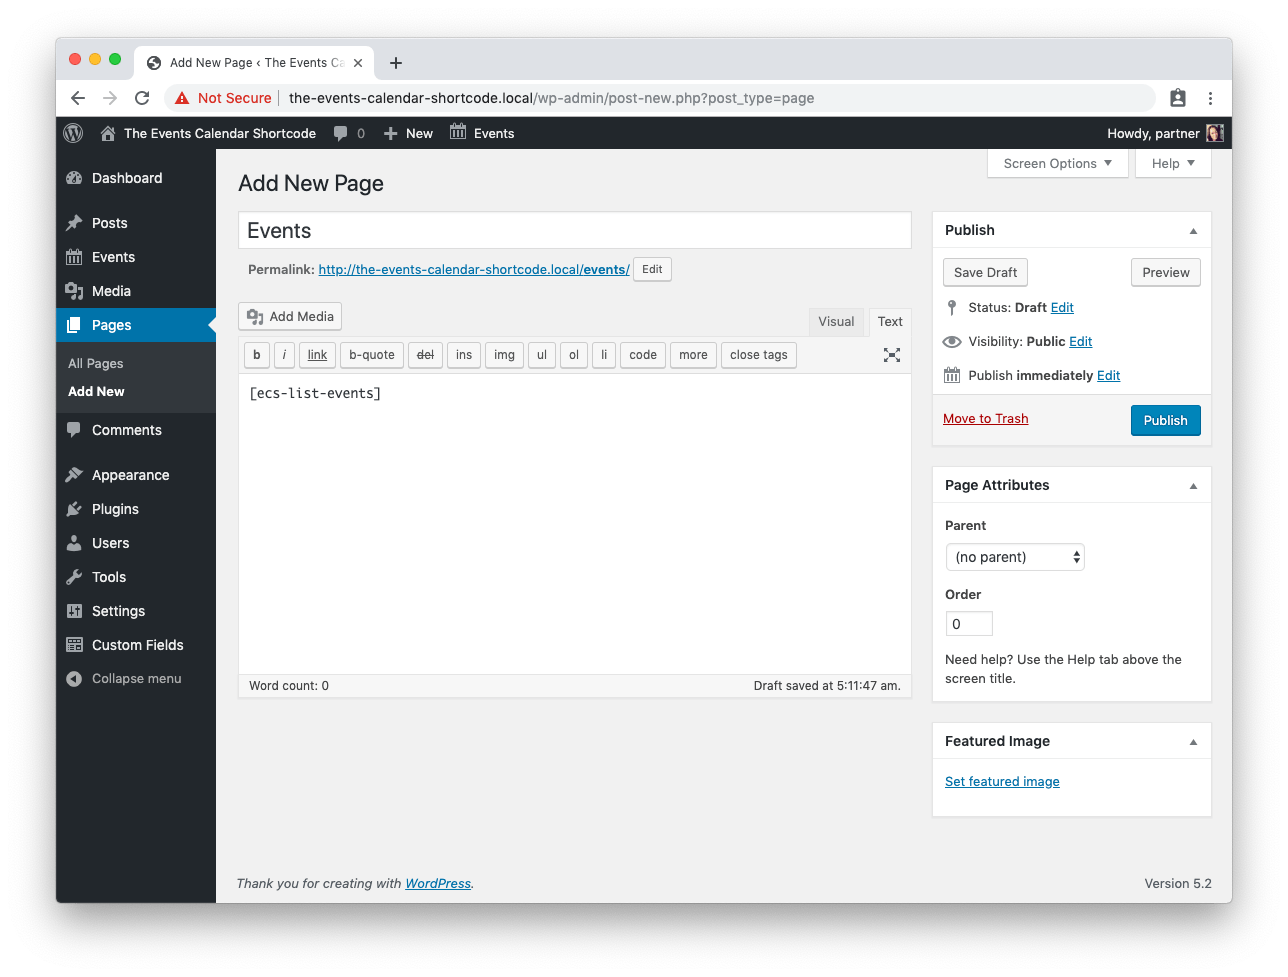
For this example, I’ve turned off editor blocks so I can use the classic WordPress editor. The Events Calendar Shortcode & Blocks plugin also provides a block for the new editor. To insert an event as a block, simply search your blocks for “the events calendar block.”
Now, back to the shortcode. Here’s what you’ll see on the front-end of your site:
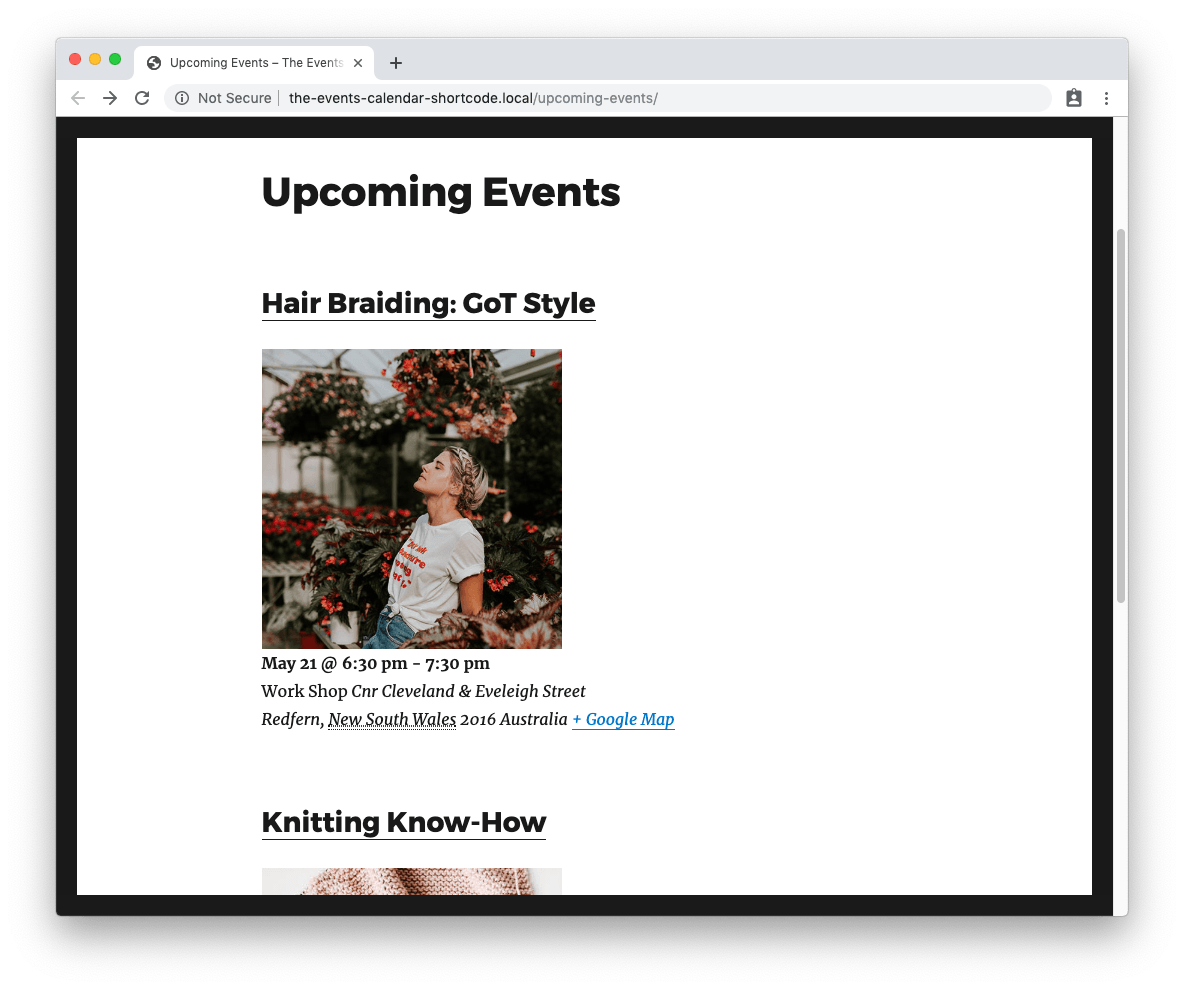
It’s looking pretty basic right now. The events are displaying as a list in a single column with a simple event description. But as you’ll see in this guide, there’s an extensive list of filtering, display, and design options you can use to improve how the basic shortcode looks on the front-end.
Advanced Shortcodes
The Events Calendar Shortcode & Block provides an extensive number of shortcode options that you can use to completely customize how your events look. Using multiple options within the one shortcode, you can create advanced shortcodes that let you control how events are filtered, how they display, how they look, and more.
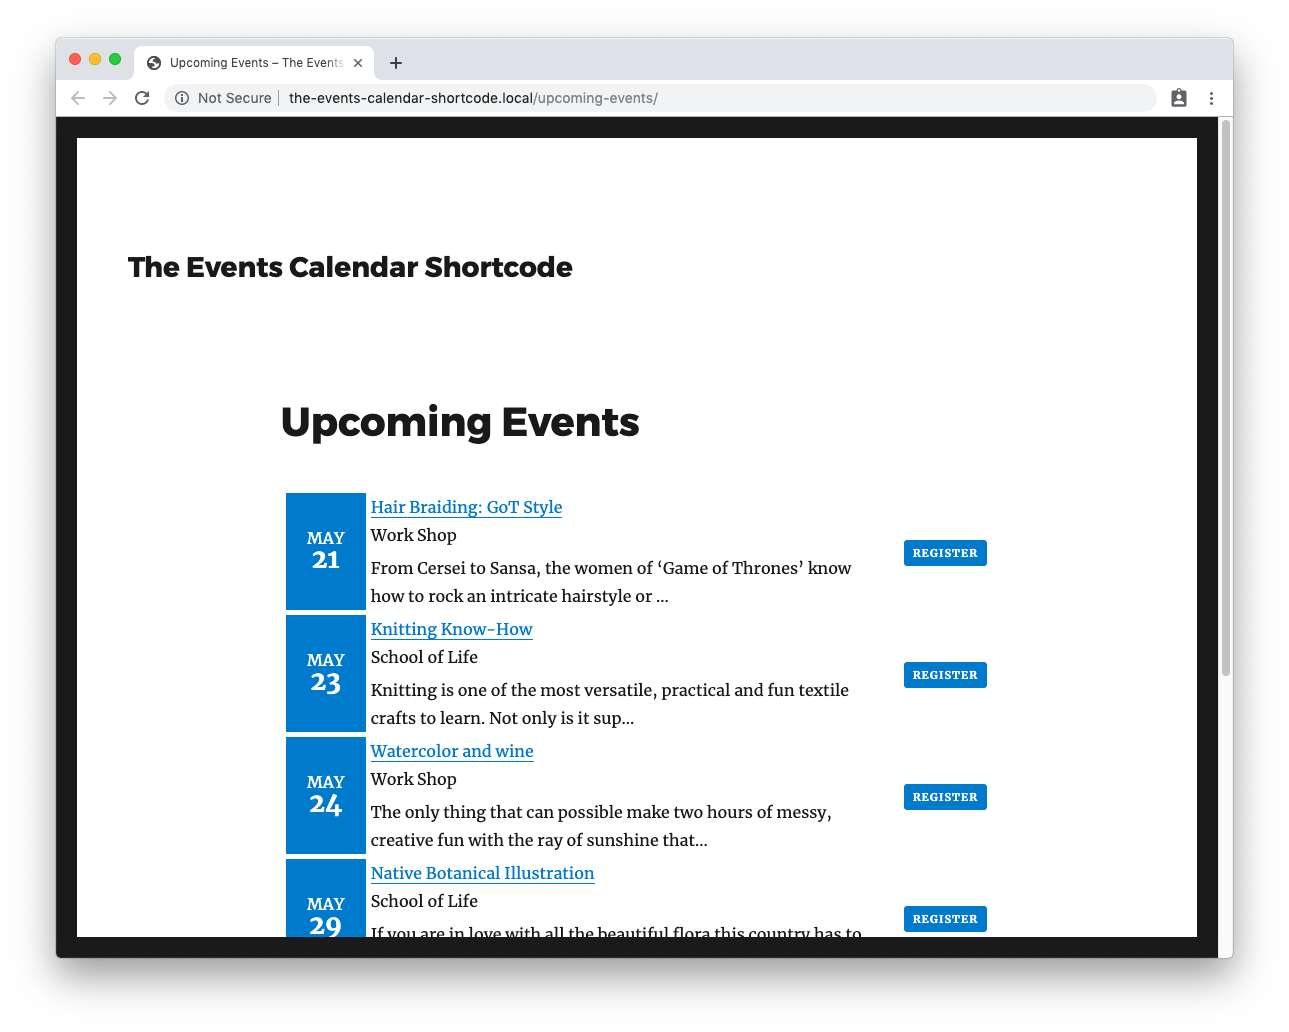
For example, say you wanted to display upcoming community classes this month using a column design, with dates, time and a thumbnail image, together with a button for registration (and you want to specify colors for the button). This is the shortcode you would use:
[ecs-list-events futureonly=’true’ month=’current’ design=’table’ titlesize=’15px’ excerpt=’true’ button=’Register’ buttonbg=’black’ buttonfg=’white’]
And this is what it looks like on the front-end:
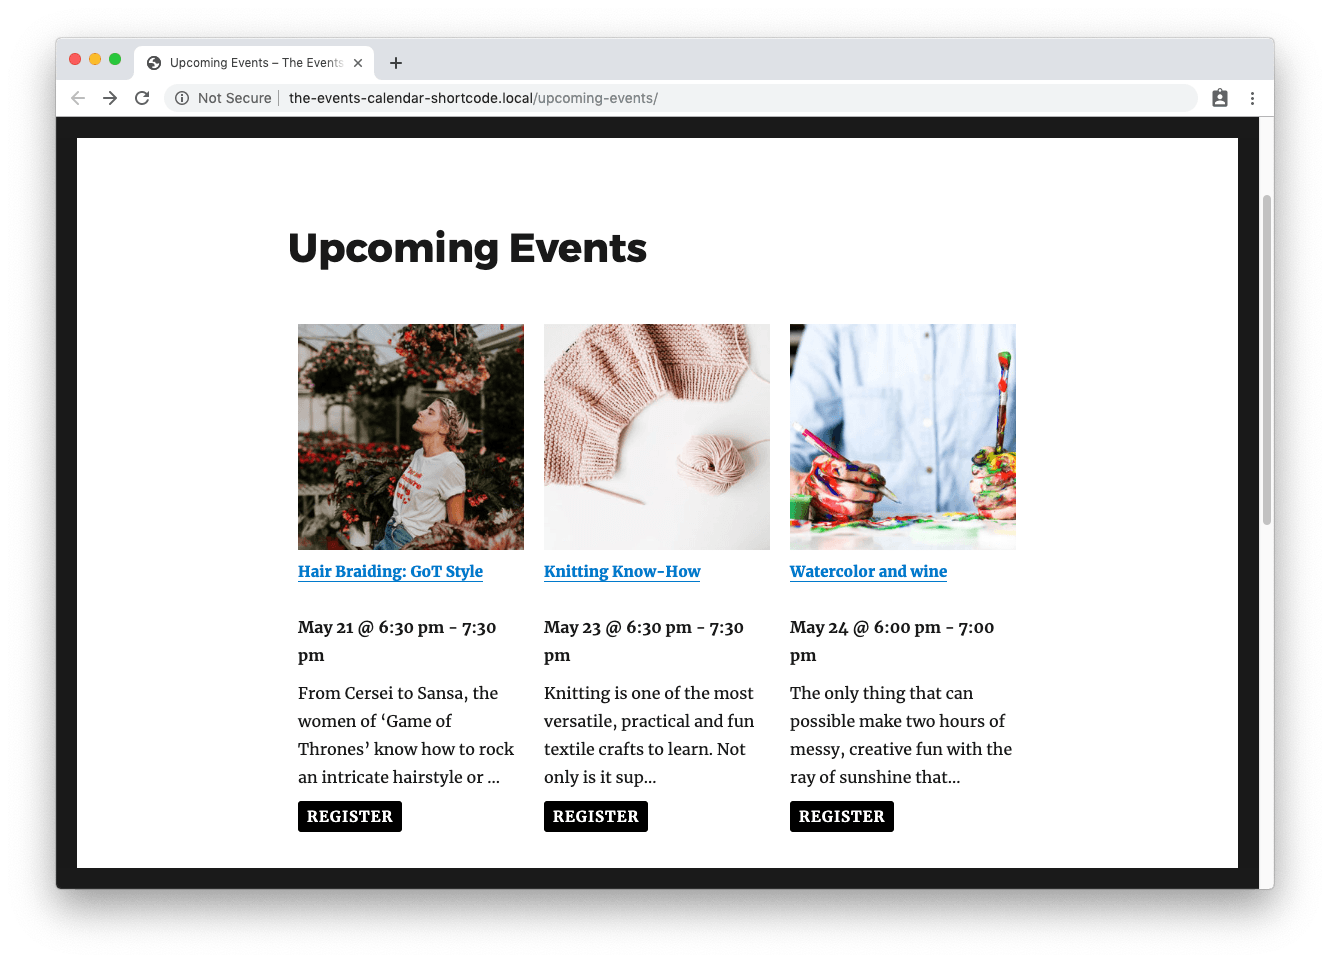
You can see how the shortcode lets you control the information that is displayed and how it’s displayed on your events page.
Now that you’ve got a solid foundation for how the shortcodes work, let’s deep dive into all the shortcodes options available in The Events Calendar Shortcodes and Block plugin.
Filtering Options
The various filtering options you can include in event calendar shortcodes from The Events Calendar Shortcode Pro add-on let you display events based on different event details and conditions, including event dates like a specific month, categories, and tags.
For instance, Spring City Public Library in Philadelphia uses The Events Calendar Shortcode & Block plugin to display upcoming events on its homepage. The site uses filtering to display the thumbnail image, title, and date for events, along with a button that visitors can click to find out more.
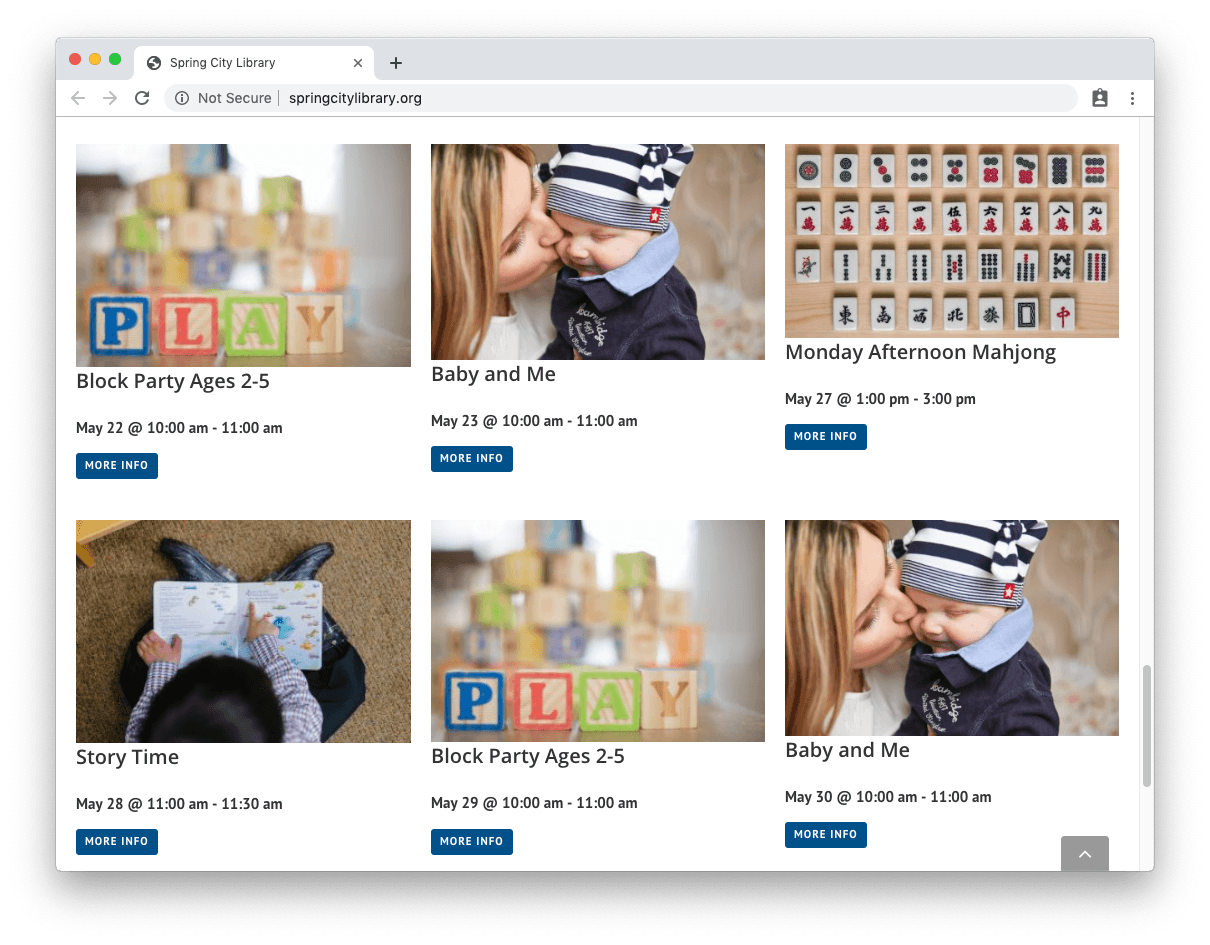
It’s a simple design, but effective as it allows visitors to easily view upcoming events at the library and read more on individual events page.
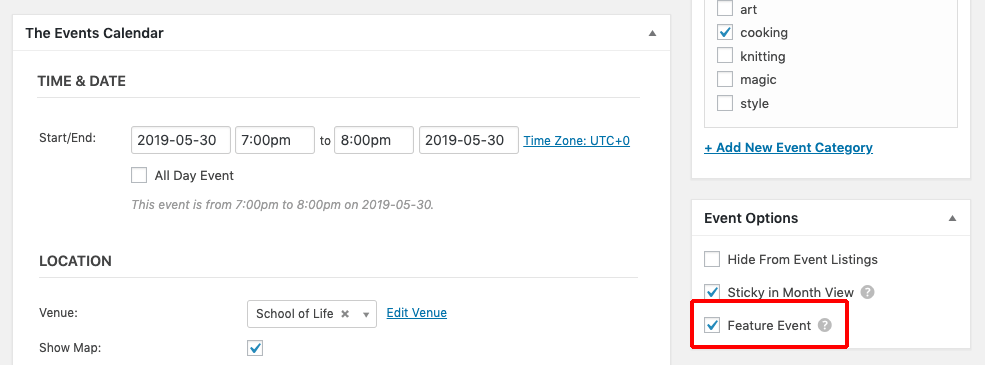
Featured only
Show only events that you’ve marked as “featured”:
[ecs-list-events featured_only=’true’]
To mark an event as featured, go to Events, choose the event you want to feature and check “Feature Event”:
Exclude featured only
Exclude events that you’ve marked as “featured” events:
[ecs-list-events exclude_featured=’true’]
Category
Show events from one or more categories on your site. For example, say you run a community center that holds free workshops. You might assign categories to your events, like art OR knitting. Use commas for multiple event categories.
[ecs-list-events cat=’art’]
[ecs-list-events cat=’art, knitting’]
Exclude categories
Exclude events from one or more categories, i.e. events that have been assigned the event category cooking OR style. Use commas for multiple categories.
[ecs-list-events exclude_cat=’cooking’]
[ecs-list-events exclude_cat=’cooking, style’]
Include all categories
To show events that use all of the categories you specify, use the tag_cat_operator option, i.e. show events that have been assigned the categories art AND knitting.
[ecs-list-events cat=’art, knitting’ tag_cat_operator=’AND’]
[ecs-list-events tag=’art, knitting’ tag_cat_operator=’AND’]
Tag
Show events with one or more tags. To use the community center example again, you might tag events for who they are appropriate for, e.g. children OR seniors. Use commas for multiple tags.
[ecs-list-events tag=’children’]
[ecs-list-events tag=’children, seniors’]
Exclude tags
Exclude events with one or more tags, i.e. events that have been assigned the tags cooking OR style. Use commas for multiple tags.
[ecs-list-events exclude_tag=’children’]
[ecs-list-events exclude_tag=’children, seniors’]
Include all tags
To exclude events that use all of the tags you specify, use the tag_cat_operator option (the same option you would use for categories), i.e. events that have been assigned the tags cooking AND style.
[ecs-list-events exclude_cat=’art, style’ tag_cat_operator=’AND’]
[ecs-list-events exclude_tag=’children, seniors’ tag_cat_operator=’AND’]
Days
Specify the number of days from today and fetch those events. This option overrides the month option.
For example, to show events for the next 24 hours:
[ecs-list-events days=’1′]
Similarly, to show events for the coming week:
[ecs-list-events days=’7′]
Day
Not to be confused with the days option above, the day option lets you show events that are scheduled for a specific day. This option overrides the month option.
For example, you might want to display events scheduled for 14 May 2019 or events that are on today:
[ecs-list-events day=’2019-05-14′]
[ecs-list-events day=’current’]
Or you might want to display a relative date, such as for events that are on in five days’ time.
[ecs-list-events day=’+5 days’]
Month
Only show events for a specific month. To specify the month, use the value current to display events for the current month or next for next month. Use The Events Calendar month view shortcode:
[ecs-list-events cat=’cooking’ month=’current’]
[ecs-list-events cat=’style’ month=’2019-05′]
Year
Only show events for a specific year. To specify the year, use the value current to display events for the current year. For future events that haven’t happened yet, use the option futureonly=’true’, e.g. upcoming events in 2019. All year values need to be in “YYYY” format.
[ecs-list-events year=’2020′]
[ecs-list-events year=’current’]
[ecs-list-events year=’2019′ futureonly=’true’]
Date range
Show events between a certain event date range. This shortcode option is great when you want to display events for festivals or seasonal celebrations that are held during certain times of the year, and filter out other events.
To specify the event dates, use the format year-month-date.
[ecs-list-events fromdate=’2019-05-16′ todate=’2019-06-16′]
To use relative days:
[ecs-list-events fromdate=’today’ todate=’+5 days’]
[ecs-list-events fromdate=’+7 days’ todate=’+14 days’]
You can also use either the from or to date:
[ecs-list-events fromdate=’2019-05-17′]
[ecs-list-events todate=’2016-10-17′]
To only show future events, you can use the futureonly option:
[ecs-list-events futureonly=’true’ todate=’2019-08-01′]
If you want to show events filtered by start date and hide any that have finished, use the hide_finished=’true’ option:
[ecs-list-events fromdate=’-7 days’ todate=’today’ key=’start date’ hide_finished=’true’]
Include in progress
To show events that are in progress, you can use include_in_progress with the date range, days, day and year options, i.e. the event starts before and ends after the current day.
This option is useful when you want to continue promoting events that are underway.
[ecs-list-events day=”current” include_in_progress=”true”]
[ecs-list-events days=”14″ include_in_progress=”true”]
[ecs-list-events fromdate=”2019-05-31″ todate=”2019-10-31″ include_in_progress=”true”]
Location (city, state, and country)
Filter events by city, state or province, or country. Use commas to separate more than one location. Use — instead of a comma if the city, state, or country name includes a comma.
[ecs-list-events city=’New York’]
[ecs-list-events state=’NY’]
[ecs-list-events country=’Canada, United States’]
[ecs-list-events country=’Korea– Republic of’]
Event ID
Show a single event using its unique ID. This option is useful if you want to display event details in a blog post or on a promotional landing page.
[ecs-list-events id=’246′]
To find the unique ID for a particular event, log in to your WordPress site and navigate to the page for the event you want to show. You’ll see the ID after “post=.”
In this case, the event ID for Picklehead’s Pickling Workshop is 30.
Exclude ID
Hide the current event from a listing.
[ecs-list-events exclude_id=’current’]
This option is useful if you want to display upcoming events on the same page as a single listing, but want to exclude the current event.
To hide a particular event, use the event ID as the value:
[ecs-list-events exclude_id=’246′]
[ecs-list-events exclude_id=’246, 135′]
Venue ID
Filter events by one or more venue IDs. Use commas to separate multiple venue IDs.
[ecs-list-events venue_id=’12’]
To find the unique ID for a particular venue, log in to your WordPress site and navigate to the page for the venue you want to show. You’ll see the ID after “post=.”
In this case, the venue ID is 11.
Organizer ID
Filter events by one or more organizer IDs. Use commas to separate multiple organizer IDs.
[ecs-list-events organizer_id=’2, 5′]
To find the unique ID for a particular organizer, log in to your WordPress site and navigate to the page for the organizer you want to show. You’ll see the ID after “post=.“

In this case, the organizer ID is 33.
Display Options
The various display options for The Events Calendar Shortcode & Block let you choose how you want to display the event list on your site and which pieces of information to include, including event details, descriptions, order, messages, and buttons.
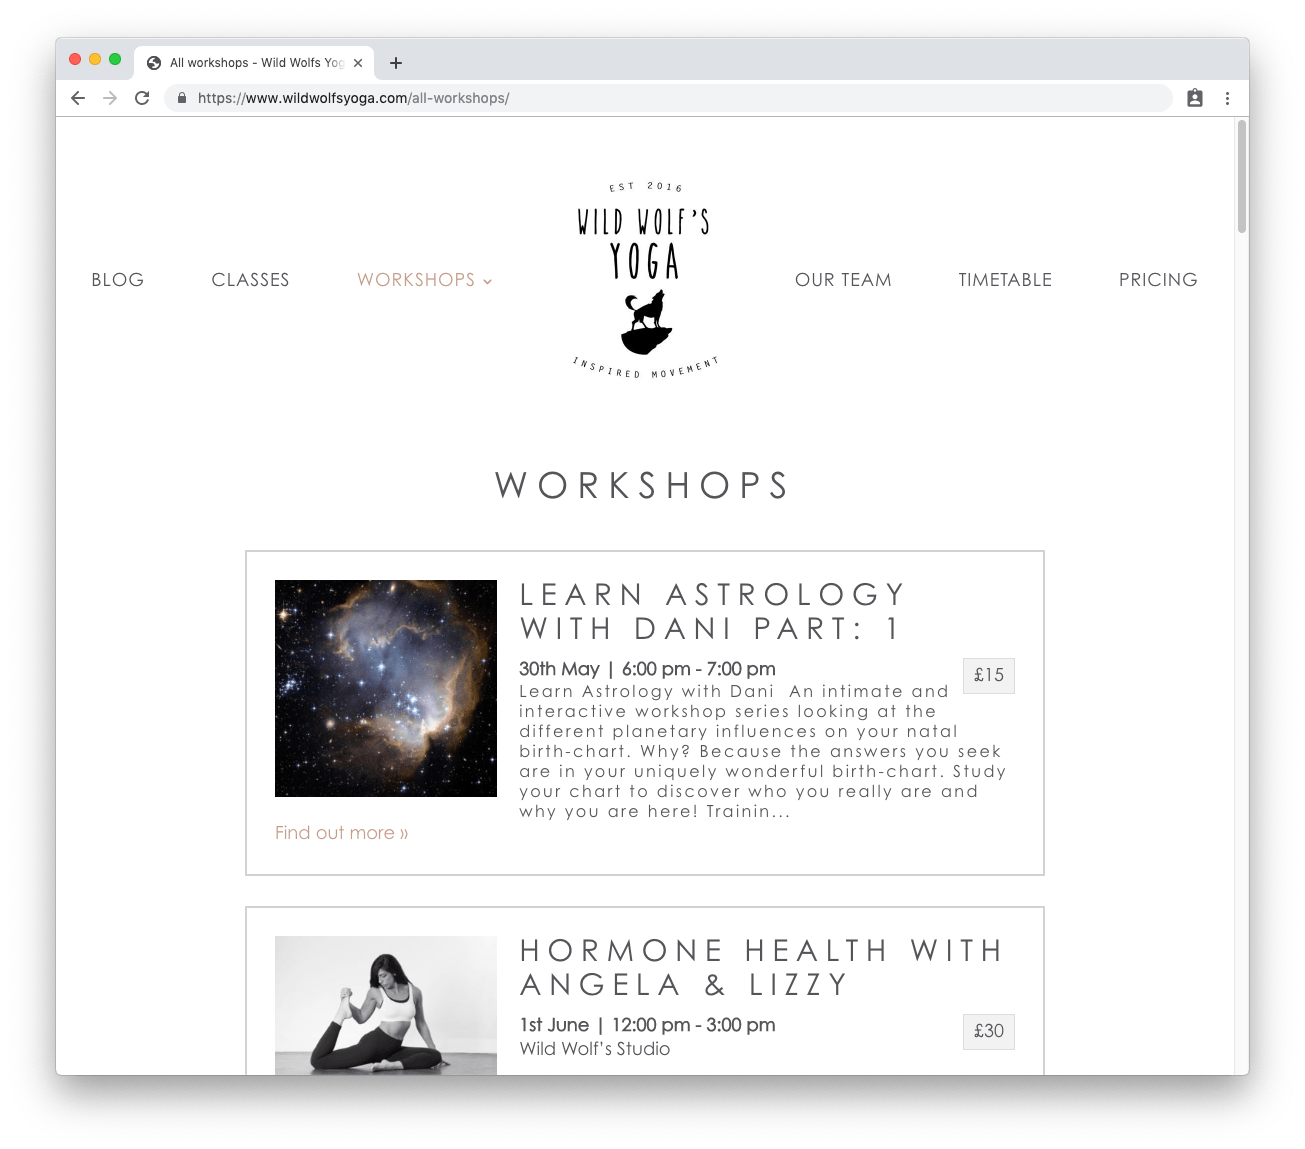
Wild Wolf Yoga, for example, uses The Events Calendar Shortcode & Block to display a list of upcoming workshops. The site uses various display options to provide visitors with relevant event information, including descriptions, venue, and cost.
Future Events (default)
To display upcoming events. This is the default setting and an option you’re more likely to use in combination with other shortcodes when specifying dates.
[ecs-list-events futureonly=’true’]
On this shortcode and the upcoming others, make sure that you are typing “list-events” and not “events_list”.
Past Events
Show your past events, i.e. events that have already happened.
[ecs-list-events past=’yes’]
Limit
Set the maximum number of events you want to show. The default is 5 events. This option is useful if you want to limit the total number of events displayed.
[ecs-list-events limit=’3′]
Offset
Skip a certain number of events from the beginning of your list. This option is useful for splitting your events into columns or when using multiple shortcodes on the same page.
[ecs-list-events offset=’2′]
Hide sold out
Hide events that are sold out. This option is available for use with the Events Tickets or Event Tickets Plus addon by Modern Tribe.
[ecs-list-events hide_soldout=’true’]
Note: Due to the complexity of this option, the numbers of events displayed may decrease. Use the limit option to show more events if needed.
Hide recurring events
Show only the first instance of a recurring event. This option is available for use with The Events Calendar PRO.
[ecs-list-events hiderecurring=’true’]
Order
Show events by date in ascending or descending order.
[ecs-list-events order=’DESC’]
[ecs-list-events order=’ASC’]
Order by date
Order events by the start or end date. This option is useful if you have multi-day events or you don’t want to hide the event until the full event time has passed.
[ecs-list-events orderby=’start date’]
[ecs-list-events orderby=’end date’]
To sort by the name of the event:
[ecs-list-events orderby=’title’]
Content order
Manage the order of content shown for events. Use commas to separate details. The default order is title, excerpt, data, venue.
[ecs-list-events cat=’art’ limit=’6′ order=’DESC’ viewall=’false’ contentorder=’thumbnail, title, date, venue, excerpt,’]
Time only
Show only the start time for an event using the values true or false. The default is false.
[ecs-list-events timeonly=’true’]
Date
Show or hide the date for events using the values true or false. The default is false.
[ecs-list-events eventdetails=’true’]
Venue
Show or hide the name of the venue using the values true or false. The default is false.
[ecs-list-events venue=’true’]
Excerpt
Show or hide the excerpt for events, and set excerpt length. The default is false.
[ecs-list-events excerpt=’true’]
[ecs-list-events excerpt=’250′]
Raw excerpt
Show the raw excerpt without stripping any HTML or modifying it in any way. That means you won’t be able to set an excerpt length like with the previous option.
[ecs-list-events excerpt=”true” raw_excerpt=”true”]
Description
Show the full event description for the excerpt rather than the WordPress excerpt or short description.
[ecs-list-events excerpt=”true” description=”true”]
To avoid removing any formatting or links, such the raw_description option:
[ecs-list-events excerpt=”true” description=”true” raw_description=”true”]
Thumbnails
Show or hide featured image thumbnails. The default is false.
[ecs-list-events thumb=’true’]
To specify thumbnail size (the default is medium):
[ecs-list-events thumb=’true’ thumbsize=’large’]
Use thumbwidth and thumbheight to customize the thumbnail size:
[ecs-list-events thumb=’true’ thumbwidth=’250′ thumbheight=’250′]
Cost
Show the cost of events when using the default design.
[ecs-list-events cost=’yes’]
“No events” message
Display a custom message when there are no events to display. The default is: “There are no upcoming events at this time.”
[ecs-list-events message=”Looks like there are no upcoming events. Check back later!”]
View all
Determines whether to show “View all events” or not using the values true or false. The default is false. If you set it to true, it will show a full list of events.
[ecs-list-events cat=’art’ limit=’5′ order=’ASC’ viewall=’true’]
Using Custom Fields
If you’ve created custom fields using Advanced Custom Fields or The Events Calendar Pro, you can filter your events using custom fields.
Advanced Custom Fields (ACF)
To find the name of the field you want to filter in ACF, go to Custom Fields, find the field group and name:
In the example above, the field name is example_field. To only show events with the value “Extra field” using this custom field, you can use this shortcode:
[ecs-list-events example_field=”Extra field”]
The Events Calendar Pro – Additional Fields
Finding the name for a custom field using the Additional Fields feature is a little more complex.
In the WordPress dashboard, click on any of your events and scroll down to “Additional Event Fields.” Right-click the text area beside it and choose “Inspect” to bring up Chrome Developer Tools (use the equivalent feature in other browsers, like Firefox). Then, find the name of the field in the code.
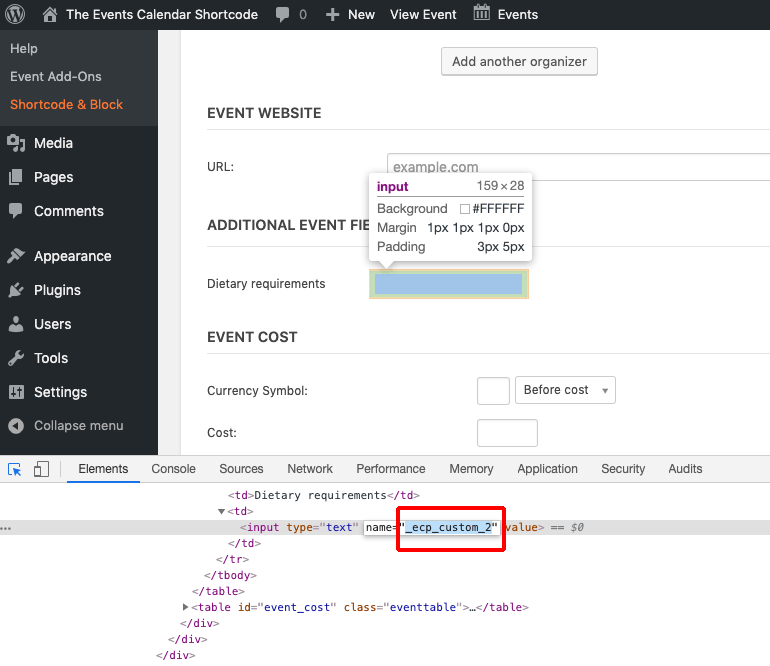
In this case, the name of the field is _ecp_custom_2. To only show events with the value “Extra field” using this custom field, you can use this shortcode:
[ecs-list-events _ecp_custom_2=”Extra field”]
Styling and Design options
By default, The Events Calendar Shortcode & Block will display a list of your events using a similar style and design to the events calendar list view:
This is by no means the design you’re stuck with! The plugin provides several shortcode options, which we’ll explore below, so you can customize the style and layout for your events. You then then further tweak your design using CSS.
Compact Design
The compact design features large dates and an overall smaller design that’s ideal for sites short on space and for widget areas.
There are several options available to customize this design, including colors. You can also combine several options into one shortcode for a more robust layout.
The basic shortcode for compact design is:
[ecs-list-events design=”compact”]

To customize the colors, use fgthumb (to change text color of the date) and bgthumb (to change the background color):
[ecs-list-events design=”compact” fgthumb=”#efefef” bgthumb=”#000000″]
[ecs-list-events design=”compact” fgthumb=”black” bgthumb=”red”]
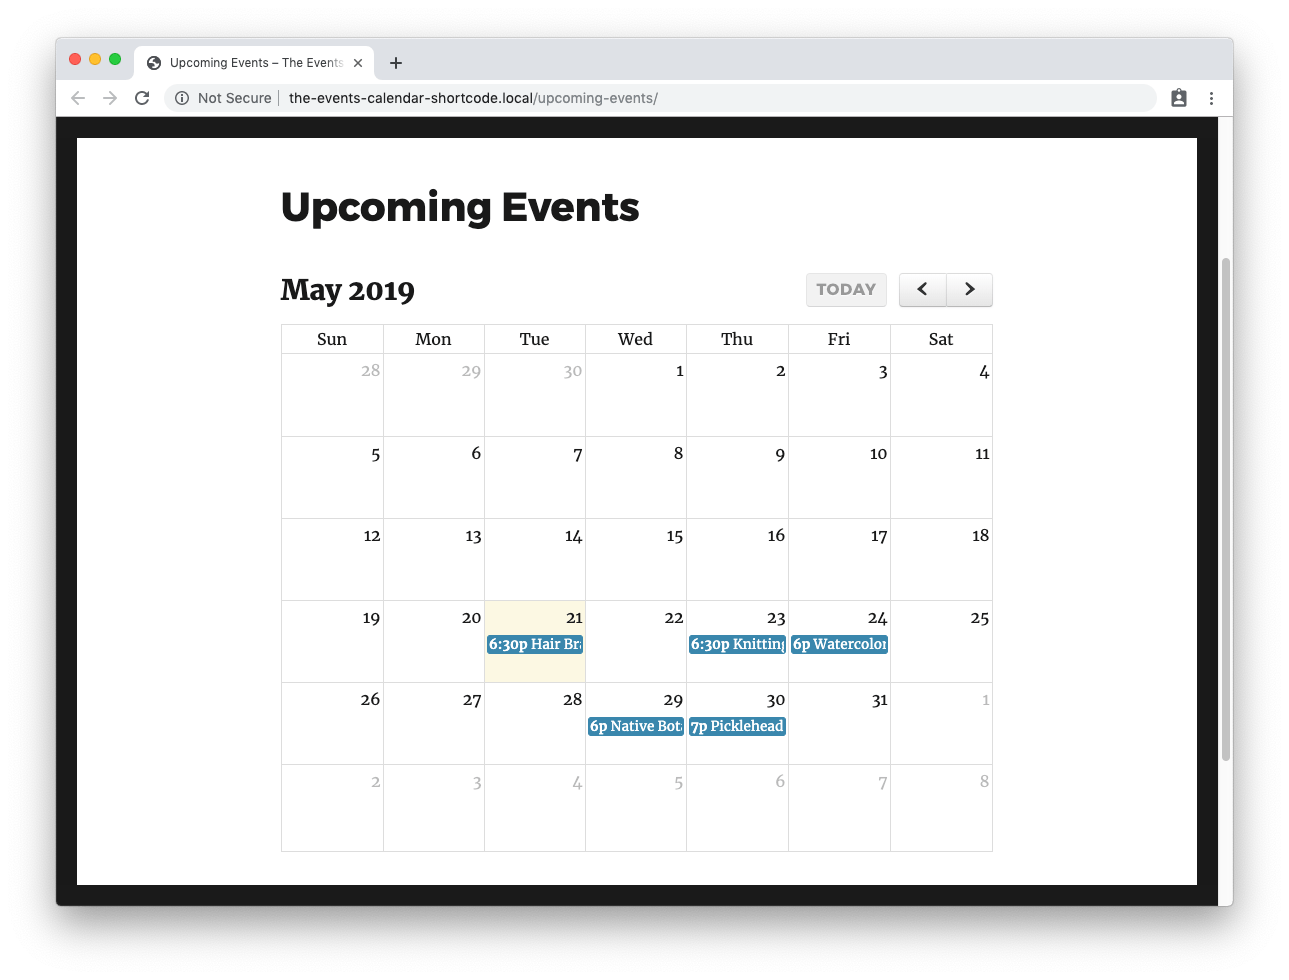
Calendar Design
The event calendar design lets you display a calendar view of your past and upcoming events. Visitors can easily switch between months and click on events to view the full calendar or just the events for next month.
The basic shortcode for the event calendar design is:
[ecs-list-events design=”calendar”]
To customize the colors, use eventbg (to change the background color for events) eventfg (to change the foreground color) and eventborder (to change the border color). This is what you’re seeing in effect in the screenshots.
[ecs-list-events design=”calendar” eventbg=”white” eventfg=”black” eventborder=”#efefef”]

To change the initial month that is shown, you can specify a default date. For example, to set the first month to May 2019 use the events calendar month view shortcode:
[ecs-list-events design=”calendar” startdate=”2019-05-01″]
To change the first day of the week to Sunday rather than Monday, use 0 for Sunday and 1 for Monday:
[ecs-list-events design=”calendar” first_day_of_week=”0″]
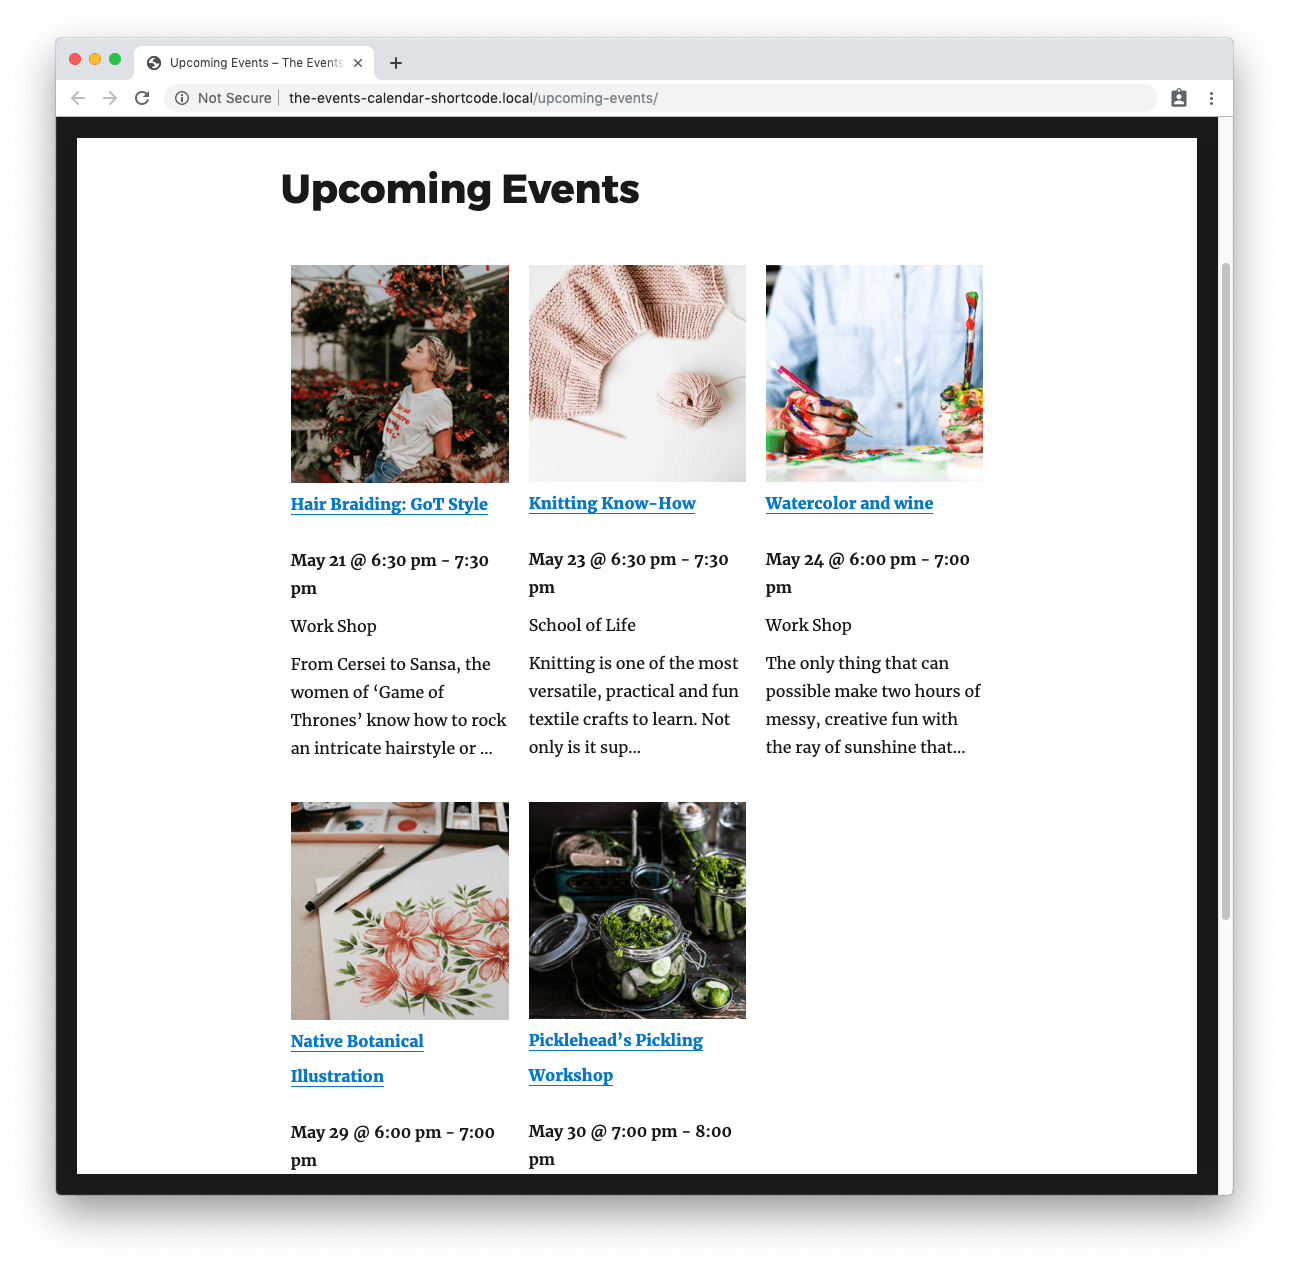
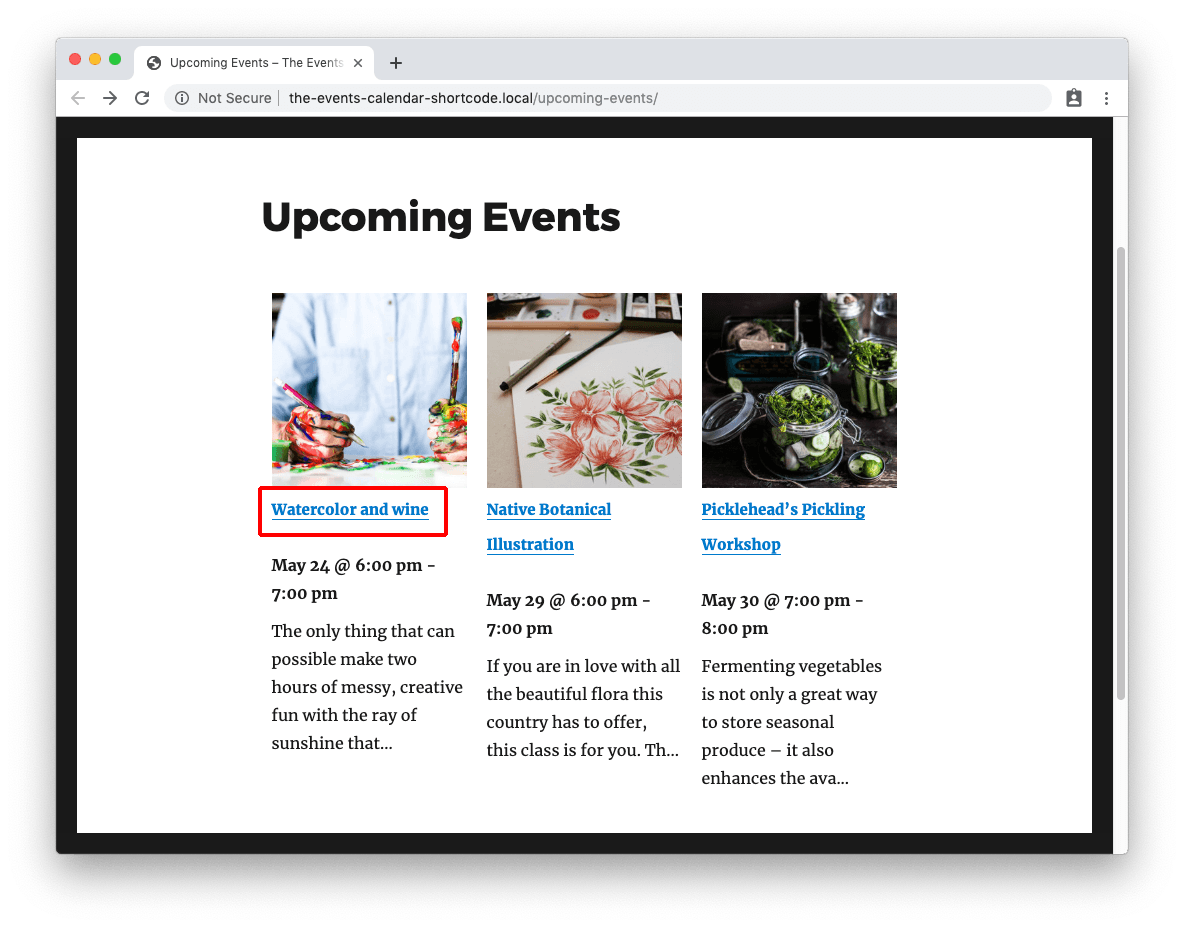
Column/Horizonal/Photo View and Table Designs
The column and table designs enable you to display events horizontally. These layouts look great if you have featured images for your events, and are ideal if you would prefer not to list events vertically.
To display events in columns, you can use the design=”columns” option. This design is similar to what you’d see on Pinterest, i.e. the rows aren’t aligned and flow into each other.
[ecs-list-events design=”columns”]
To display events in a table, you can use the design=”table” option. This design will lay out your events so the columns and rows are aligned.
[ecs-list-events design=”table”]
Grouped Design
The grouped design allows you to display multiple events that are held on the same day, grouped together with the date as the header.
[ecs-list-events design=”grouped”]
This design option is ideal if you have lots of events to display, including several events for particular dates.
More Design Shortcode Options
You can use the following options to further customize the styles for certain designs:
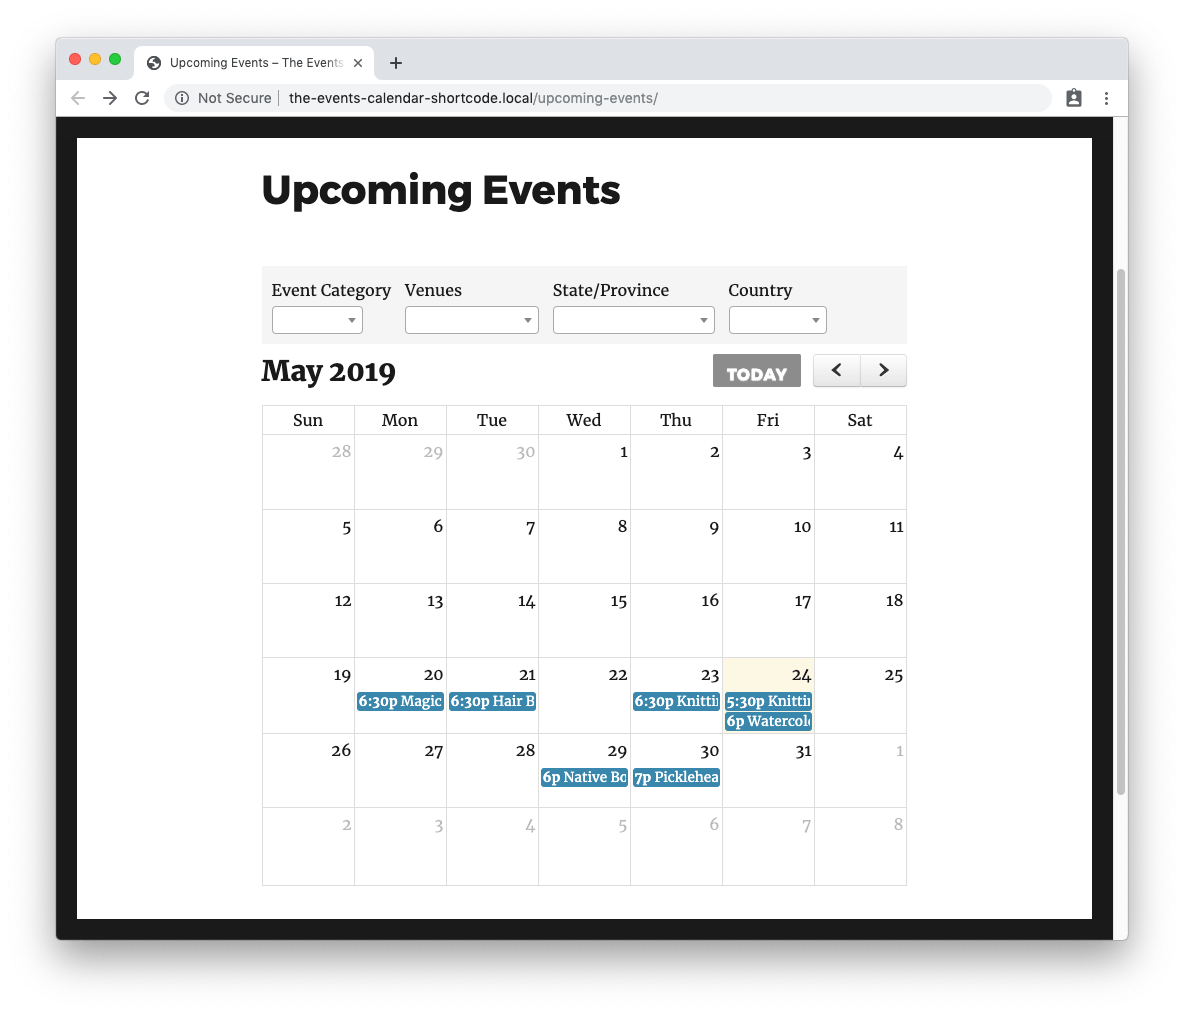
Filter bar
Display a filter bar above your events. This is a great option if you have multiple events and want to provide an easy way for people to find events when they do a Google search.
[ecs-list-events design=’calendar’ filterbar=’true’]
Title size
Depending on your theme, you might want to change the font size for titles.
[ecs-list-events design=’table’ titlesize=’15px’]
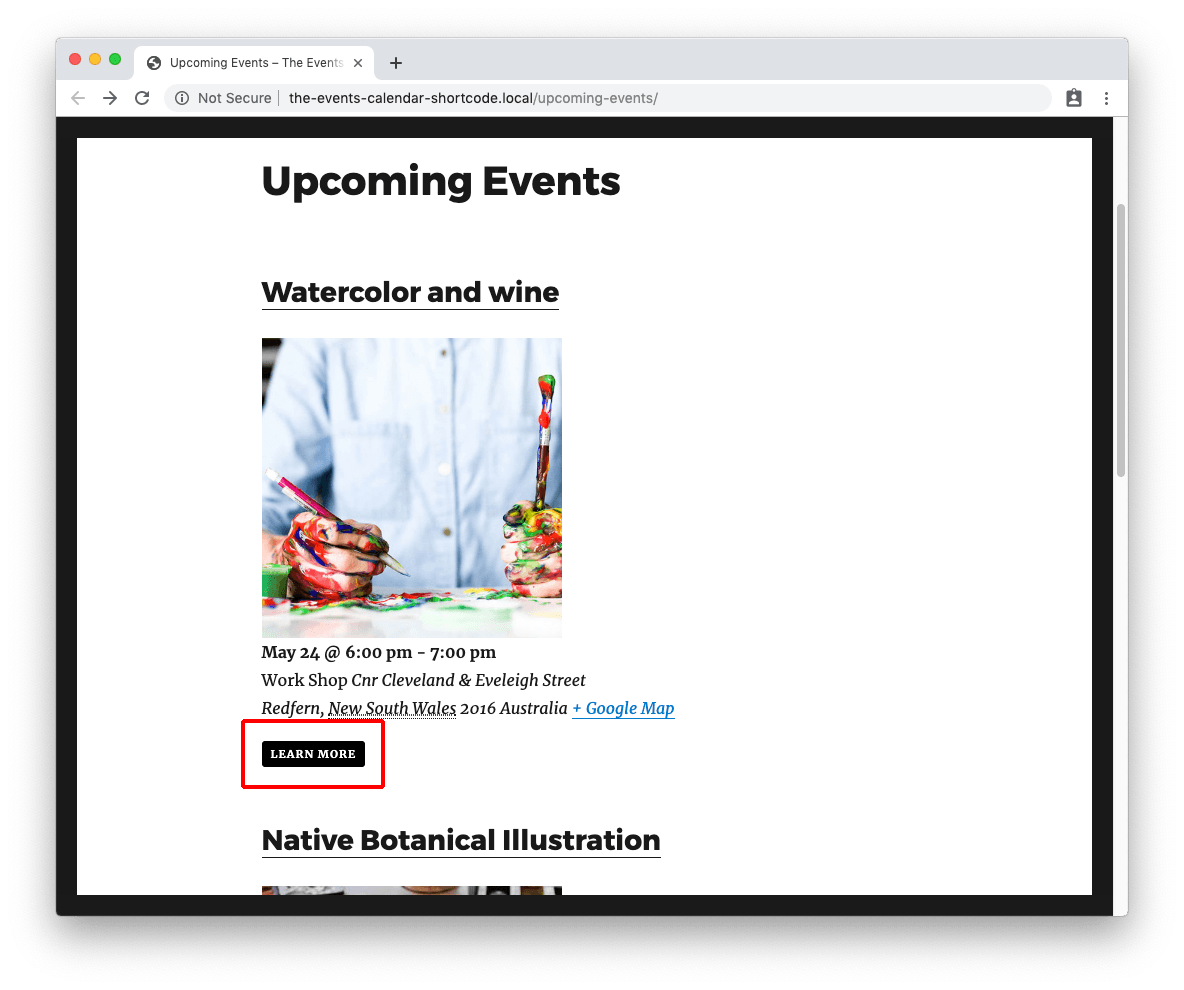
Buttons
Display a button with a link to the event. You can change the “Learn more” text to whatever you want.
[ecs-list-events button=’Learn more’]
You can also use the event website URL instead of the regular link for the button.
[ecs-list-events button=’Learn more’ buttonlink=’website’]
Customize the background and font colors for your buttons.
[ecs-list-events button=’Learn more’ buttonlink=’website’ buttonbg=’black’ buttonfg=’white’]
For more design examples and shortcode combinations, check out The Events Calendar Shortcode & Block demo site to see each of the design options above in action.
Custom Designs
With The Events Calendar Shortcode & Block, you’re not limited to the pre-made designs shown above — you can create your completely custom design template for your events.
To create a custom design:
- In your WordPress directory, go to wp-content > themes and create a folder called tecshortcode
- Create a file in the “tecshortcode” folder called “custom-design.php”
- You can then add the shortcode to your site using the name of the file you created, in this case “custom-design”
[ecs-list-events design=”custom-design”]
You can create multiple templates for your events following the steps above, and style your templates how you like using CSS. For more on how to create custom designs for your events, read the documentation.
Ready to Start Customizing Your Events?
The Events Calendar Shortcode & Block Pro provides a simple, powerful and extensive list of shortcodes you can use to control how you filter, display and style events on your site and you can learn even more about it on WordPress.org. The best part is the shortcodes and quick to insert on any page, post, or widget on your site.
Hopefully, this post has helped point you in the right direction if you’re in the middle of customizing the look and feel of the event calendar on your site.
As you can see above, there are loads of shortcode options available in The Events Calendar Shortcode Pro. Buy the pro version now and start customizing your events today!
Got a question about how to use any of the shortcodes in this guide? Let us know by submitting a question!