You can format your events in your newsletter using the following tags. They will be replaced by the actual value from your event when the newsletter is generated.
Note that not all tags are available for every event calendar and some are only available in the pro version.
If you don't see the tag you want included, let us know!
Basic Details
{title}
The title of the event
{description}
Event description
{description_with_breaks}
Pro only. Event description with line breaks (paragraphs)
{start_date}
Start date of the event, in the WordPress date format according to your site (see Settings > General in your WordPress admin). You can also specify the format of each one, for example:
{start_date|l, F j, Y}
See the documentation on date/time formats.
{start_time}
Start time of the event, in the WordPress time format according to your site (see Settings > General in your WordPress admin).
You can also specify the format of each one, for example:
{start_time|G:i}
See the documentation on date/time formats.
{end_date}
End date of the event, in the WordPress date format according to your site (see Settings > General in your WordPress admin). You can also specify the format of each one, for example:
{end_date|l, F j, Y}
See the documentation on date/time formats.
{end_time}
End time of the event, in the WordPress time format according to your site (see Settings > General in your WordPress admin). You can also specify the format of each one, for example:
{start_date|G:i}
See the documentation on date/time formats.
{link}
A link to the event with the text "More Information". Use {link_url} as the link URL to build your own link.
{link_url}
Event Link (URL only). You can see a video here on adding the link to your event to customize the text:
Though it is easier to use the Text portion of the editor to add the link, for example:
<a href="{link_url}">View Event Details</a>
{ical_link_url}
iCal Link (URL only) to add the event to an iCal compatible calendar (Apple, Outlook, etc). See above {link_url} on how to add the link to the event output.
{gcal_link_url}
Google Calendar Link (URL only) to add the event to a Google calendar. See above {link_url} on how to add the link to the event output.
{event_website}
Event or ticket website URL. You can use the same techniques as {link_url} above to create a link to the event website in your template, for example:
<a href="{event_website}">View Event/Ticket Website</a>
{recurring}
Recurring description (if recurring), for example "Occurs every 2 weeks"
{categories} {tags}
List of any categories/tags for the event. If multiple, they are separated by commas.
{category_links} {tag_links}
List of any categories/tags for the event, with each category/tag wrapped in a link to the events on your website.
{event_cost}
Event cost, with the currency symbol included (if applicable)
{excerpt}
The excerpt (short description) of the event, if any
{excerpt_with_breaks}
Pro only. Event excerpt with line breaks (paragraphs). Only manually entered excerpts will appear with breaks.
{excerpt_from_description}
Pro only. Event excerpt when the description contains the "More" tag.
{event_image}
Outputs an HTML img tag of the event image, if any. Uses the "medium" thumbnail size of the image by default.
{event_image_url}
The event image (URL only), useful for adding your own image tag with custom styling. For example:
<img src="{event_image_url}">
{colour}
The event colour. Useful for adding some custom formatting, ie.
<h3 {if_colour}style="color: {colour}"{/if_colour}>{title}</h3>
{all_day}
Outputs the text "All day" if the event occurs all day, otherwise nothing. You can use:
{if_all_day} ... {/if_all_day}
and
{if_not_all_day} ... {/if_not_all_day}
to conditionally show certain text if the event is or is not an all day event.
Location
{location_name}
Location name
{location_names}
Location names if there are multiple, separated by comma
{location_address}
Event location address
{location_city}
Event location city
{location_state}
Event location state/province
{location_zip}
Event location zip/postal code
{location_country}
Event location country
{location_website}
Event location website (URL only)
{location_phone}
Phone number of the location
Contact and/or Organizer
{contact_name}
Event contact name
{contact_info}
Event contact information
{contact_phone}
Contact phone
{contact_website}
Contact website (URL only)
{contact_email}
Contact email address
{organizer_name}
Organizer name
{organizer_phone}
Organizer phone number
{organizer_email}
Organizer email
{organizer_website}
Organizer website
Other
{instant_event}
For calendars that support an event with no end date, this will output 'instant' if it's an instant event or nothing otherwise. Can use to add to the class of an element for formatting.
{featured}
For supported calendars, allows you to use {if_featured}...{/if_featured} in custom templates. See Conditional Tags for more information.
{event_rsvp_available}
For supported calendars, allows you to use {if_event_rsvp_available}...{/if_event_rsvp_available} in custom templates. See Conditional Tags for more information.
Conditional Tags
Most tags can be used in a conditional statement. For example:
{if_event_cost} ... {/if_event_cost}
or to output something if a value is not present:
{if_not_event_cost}...{/if_not_event_cost}
One special tag is
{if_end_time} ... {/if_end_time}
which will only show the content if there is an end time specified and the end time is not the same as the start time.
Additional Fields (Events Calendar PRO)
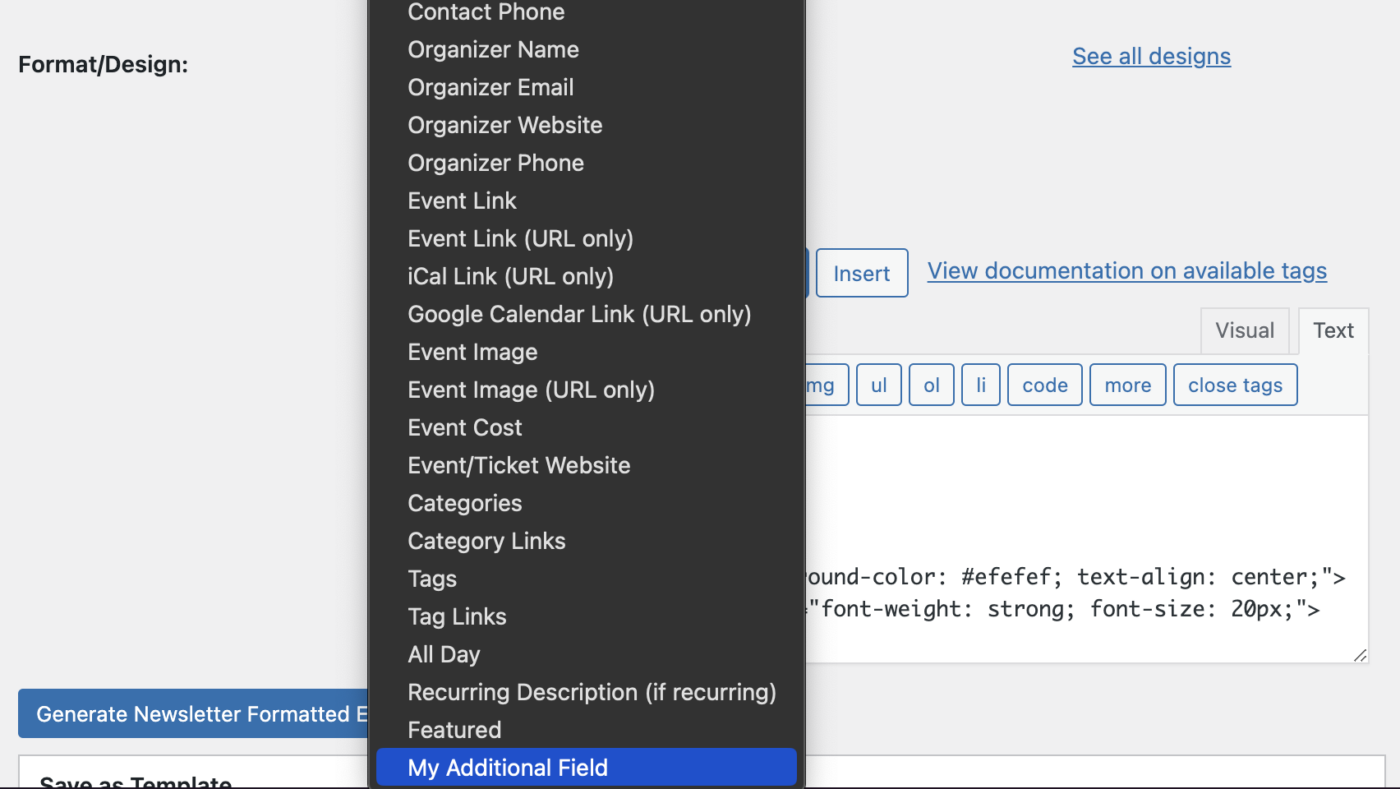
If you're using Events Calendar PRO (by StellarWP, formerly Modern Tribe) and Event Calendar Newsletter Pro, any Additional Fields you've added will automatically show as options you can add to your customized template:

The data from your Additional Fields for each event will then show in your newsletter.
Are you ready to save time and avoid errors creating your newsletters?
Absolutely ZERO risk. 14 day full refund policy.