If you want to publish events on your own WordPress site, collect RSVPs, sell tickets, and promote upcoming events without relying on a third-party platform, The Events Calendar plugin alongside The Events Calendaar Shortcode & Block and Event Calendar Newsletter is a good place to start.
In this guide, we’ll walk through the full setup process: installing the plugin, configuring the essentials, adding events, placing events in your navigation, showing Google Maps, accepting RSVPs, selling paid tickets, displaying events elsewhere on your site with a shortcode, and generating an event newsletter.
If you’d like a companion resource, you can also check out this full course on The Events Calendar.
Install The Events Calendar plugin
To get started, go to Plugins > Add New in your WordPress admin area and search for The Events Calendar. Install and activate the plugin.

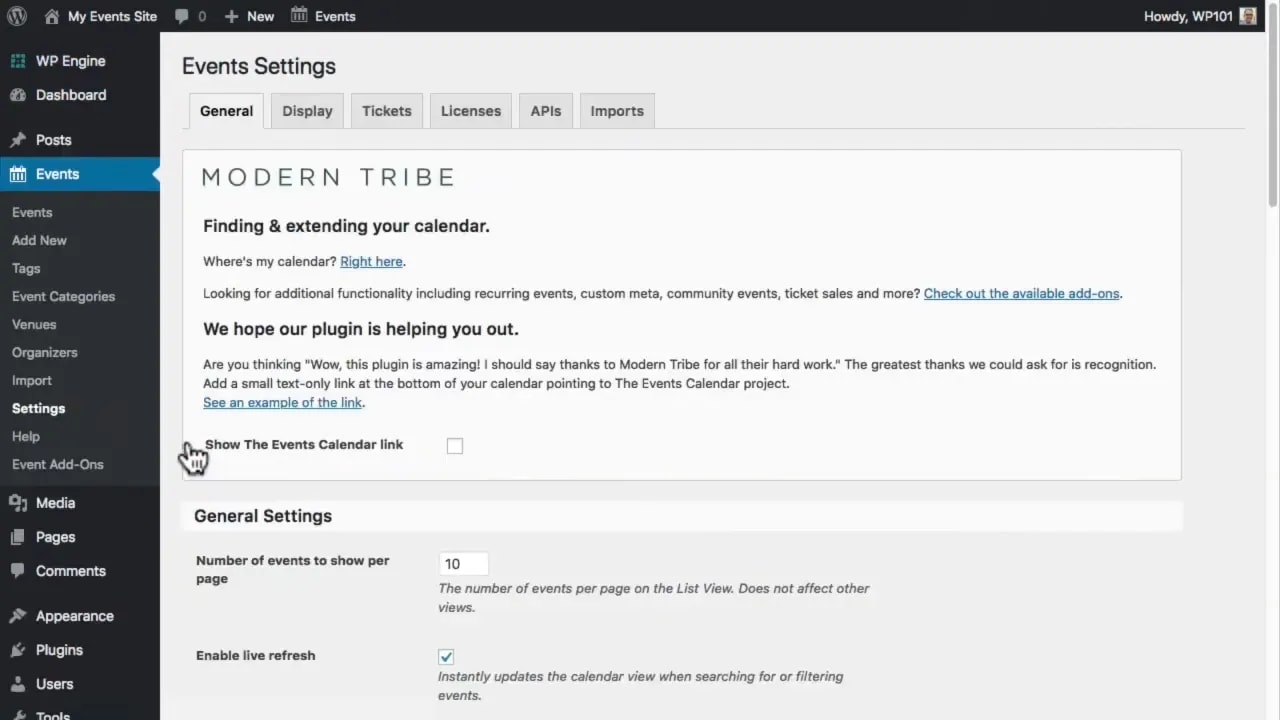
Once it’s active, head to Events > Settings. There are plenty of options available, but you only need to focus on a few key settings to get your site working properly.
Configure the most important event settings
1. Confirm your event URL slug
Inside the settings area, look for the Events URL slug. This controls where your event archive appears on your site. By default, it will usually be something like /events.
If your event URL looks messy and includes something like ?post_type=tribe_events, that usually means your permalinks are not enabled yet.
To fix that, go to Settings > Permalinks, choose one of the permalink structure options, and save your changes. Then return to the Events settings and confirm the slug again.
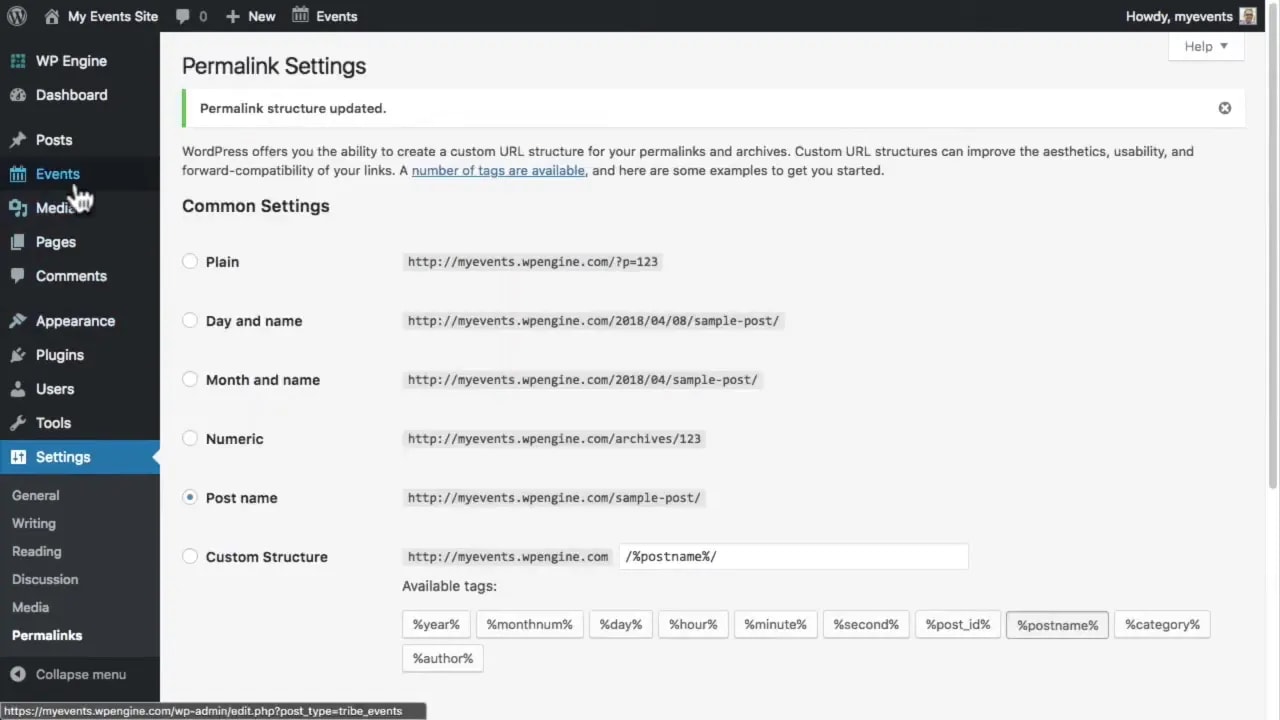
You can keep the default slug or change it to something else if needed. Just remember to save changes afterward.
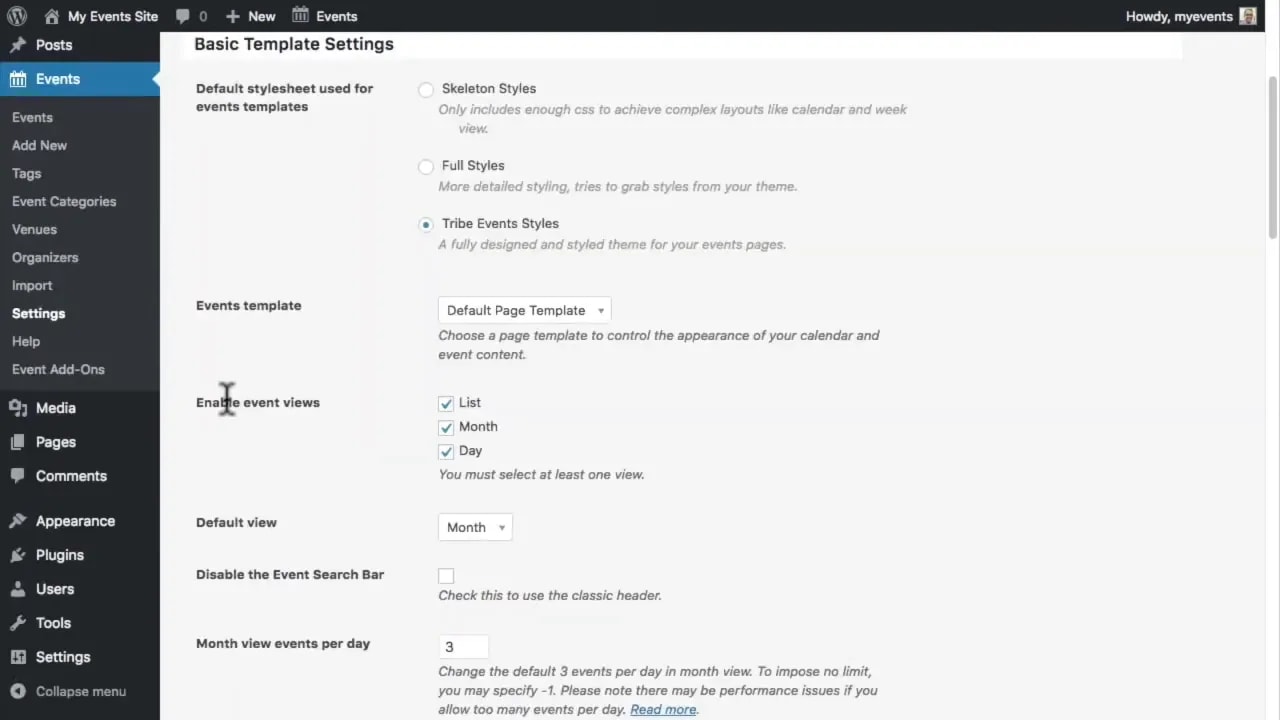
2. Choose which event views to enable
By default, site visitors can browse events in different formats such as:
- Month view
- List view
- Day view
If you don’t want to use all of these, open the Display tab in the event settings and uncheck the views you want to disable. You can also choose which one should be the default.
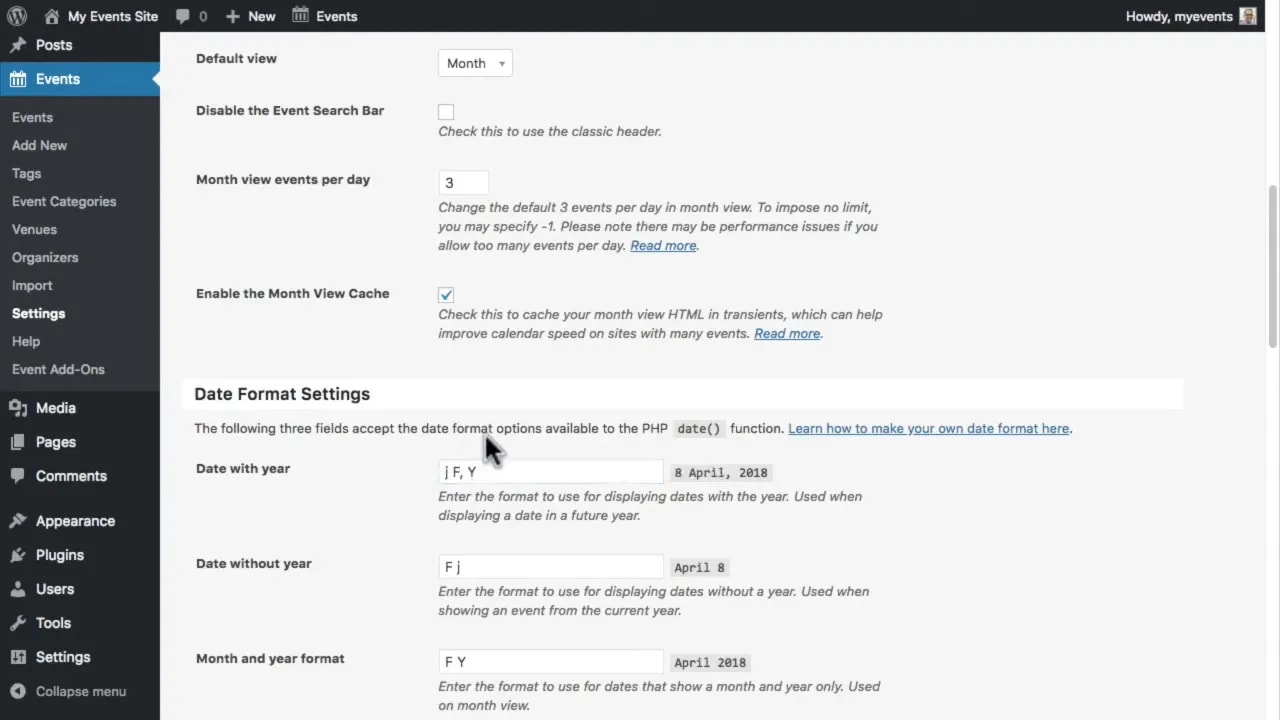
3. Adjust your event date format
Date formatting matters more than people think. Depending on your country and audience, you may want the day before the month, the month abbreviated, or a different style entirely.
The plugin lets you customize this using format characters. For example:
- j = day of the month
- F = full month name
- M = short month name
So if you want a date style with the day first, you can move the j to the beginning. If you prefer an abbreviated month instead of the full month name, replace F with M.
When you click outside the field, the plugin shows a preview so you can immediately confirm how the format will look.
4. Set the correct time zone
Before publishing events, make sure your site’s time zone is correct. Go to Settings > General, choose the appropriate time zone, and save your changes.
This is a simple step, but it prevents one of the most frustrating problems in event publishing: displaying the wrong start or end time.
Add your first event
Once the plugin is installed and configured, go to Events > Add New.
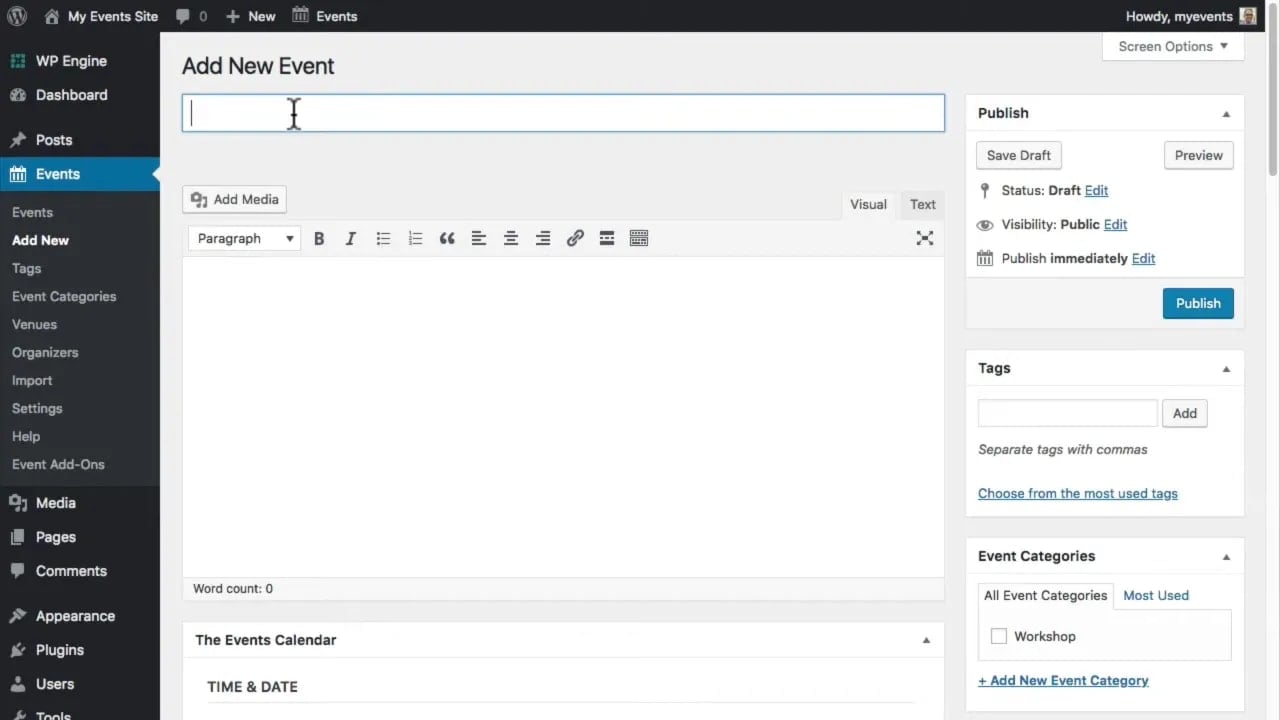
Creating an event feels similar to writing a blog post, but with additional event-specific fields.
Start with the title and description
At the top, enter the title or short description of the event. Below that, add a fuller event description.
You don’t need to repeat things like the date, time, or address inside the main description because those are handled in dedicated event fields further down the page. Instead, use this area to explain what the event is about and what people should expect.
You can use the normal WordPress formatting tools here, including:
- Headings
- Bold text
- Italic text
- Paragraphs and lists
Enter the event date and time
Next, set the event start and end date and time. If the event runs all day, simply check the All Day box.
Again, double-check the time zone here before publishing.
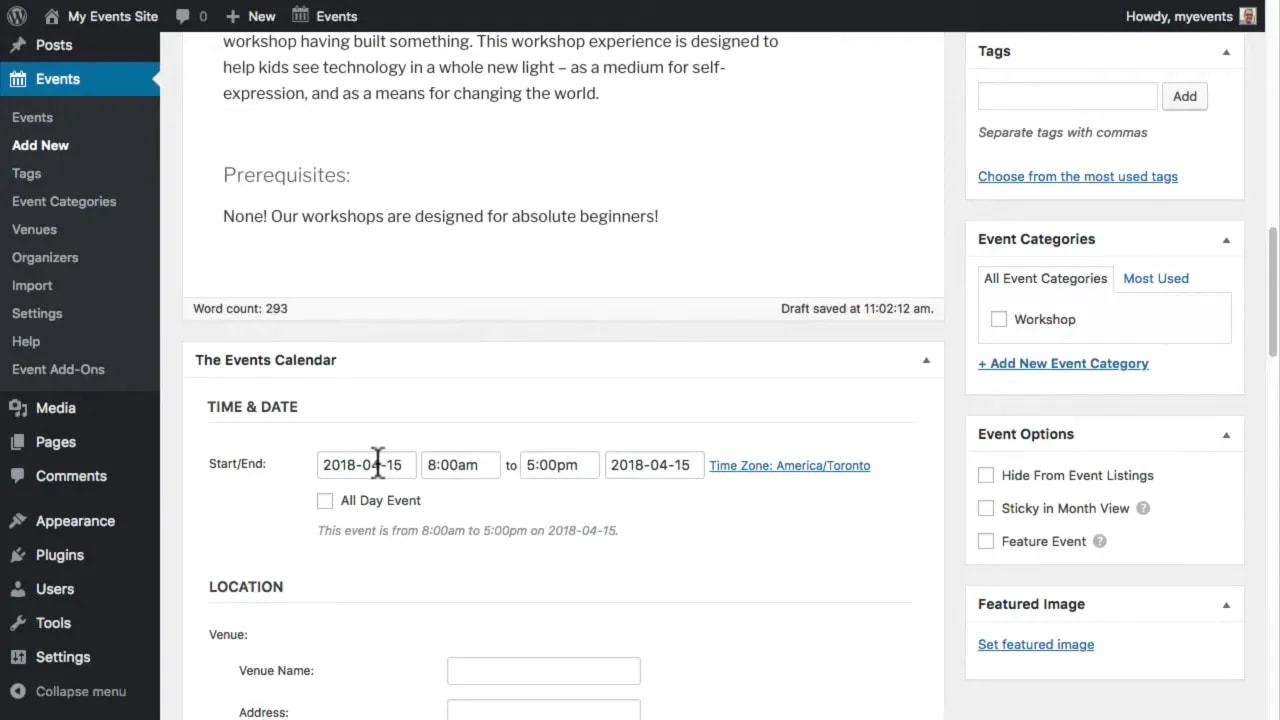
Add a venue and map if needed
You can optionally enter venue details, including as much information as you like about the location.
If you want to display a Google Map on the event page, there is a checkbox for that as well. The map can help people quickly understand where the event is being held, especially for in-person events.
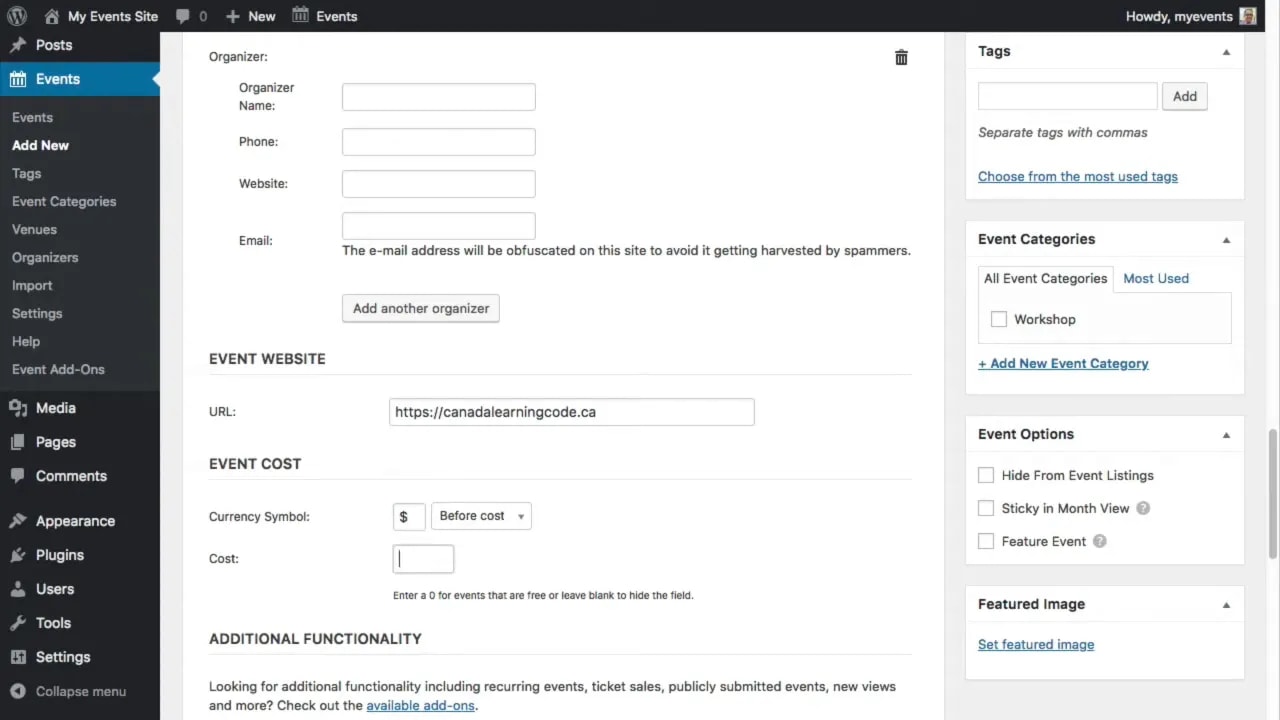
Add organizers and an external website
If one or more organizers should be listed, you can enter them in the organizer section. This is optional.
If the event has its own website or landing page with more details, add that URL as well. Doing so creates an extra link on the event so people can click through for more information.
Add pricing details
If your event has a cost, enter the currency symbol and the numeric amount. You can also choose whether the currency symbol should appear before or after the amount.
Fill in the optional event excerpt
You can also add a shorter description or excerpt for the event. This can be useful because social platforms and Google may use it when describing your event.
If you leave this blank, WordPress will usually fall back to the opening lines of your main event description.
Disable comments if appropriate
If comments are enabled on your site, it’s usually a good idea to disable them for events. For most event pages, direct contact with the organizer is a better fit than public comments.
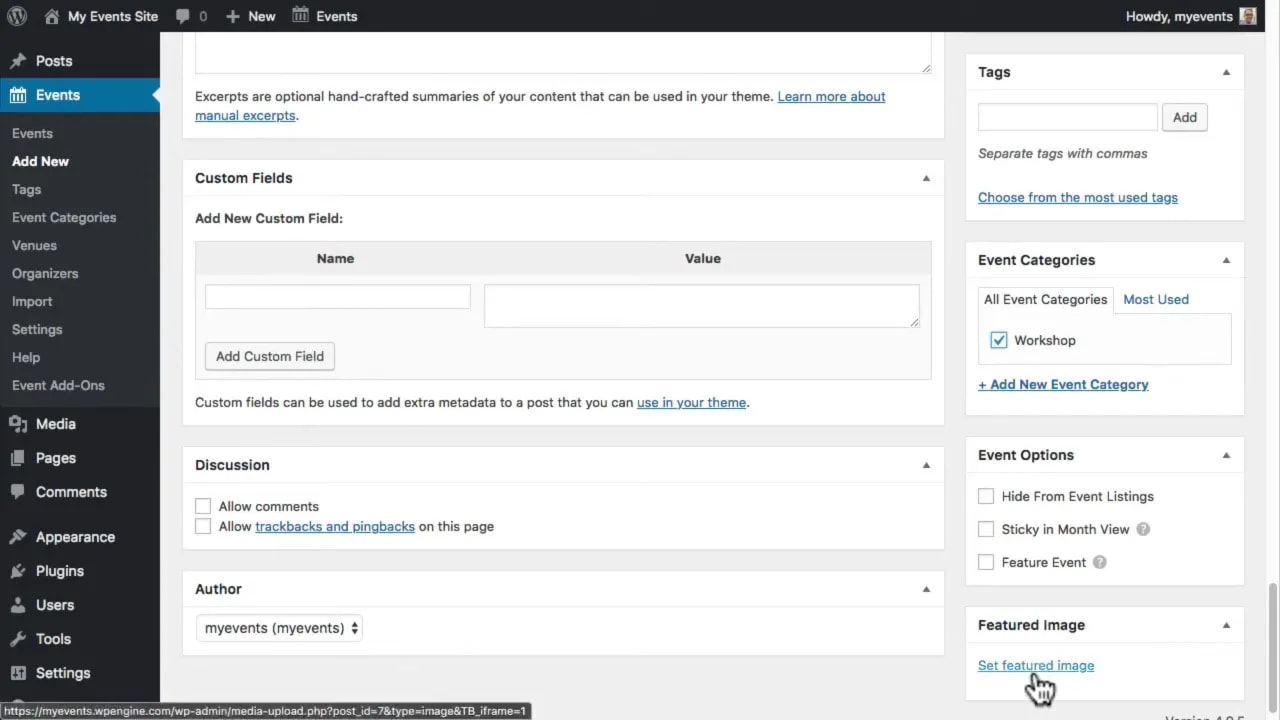
Organize events with categories, tags, and featured images
Just like blog posts, events can be organized with categories and tags. This becomes especially useful later when you want to filter or promote specific types of events.
You can also set a featured image. This may appear on the event detail page depending on your theme, and it will often be used when the event is shared on social media.
If you want to feature an event prominently on your site, check the featured event option and then publish.
After publishing, you can view the event on the front end and confirm that all details are showing correctly, including the map if one was added.
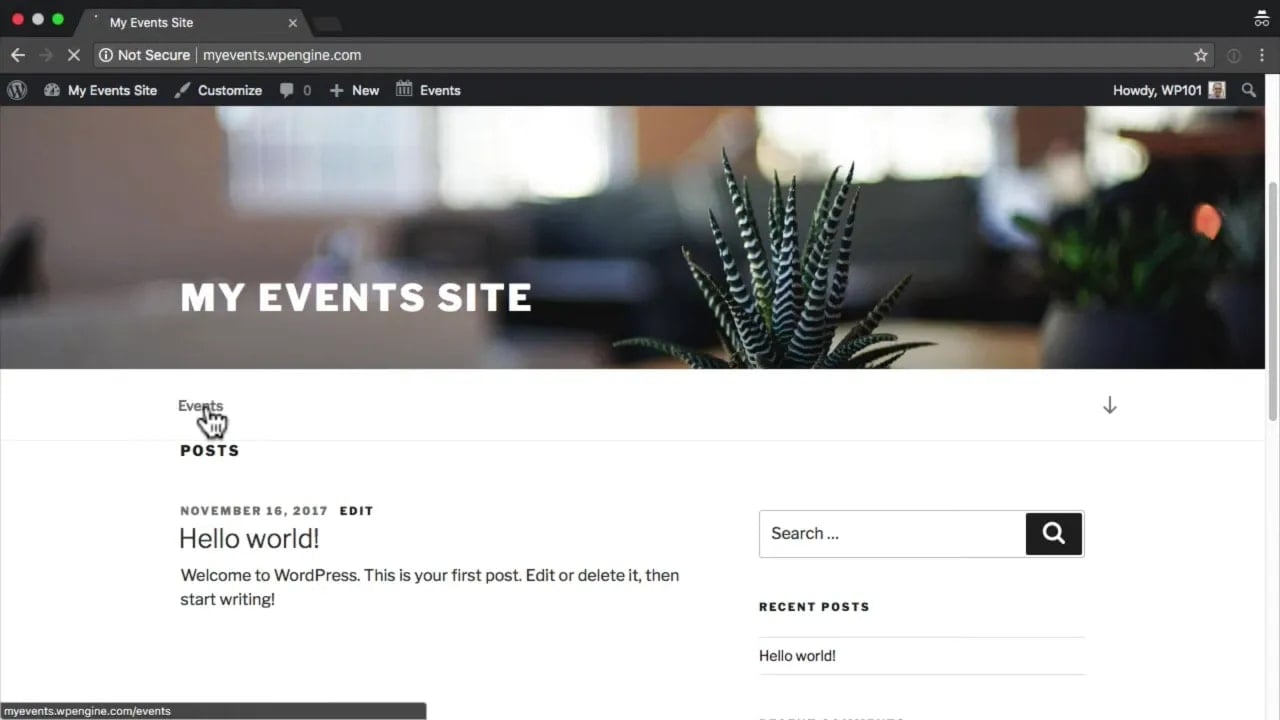
Make your events easy to find in your site menu
Your events archive may already exist at /events, but that doesn’t help much if nobody can find it from your homepage.
The easiest solution is to add an Events link to your main navigation menu.
Go to Appearance > Menus. If you don’t already have a menu, create one and give it a name such as Primary.
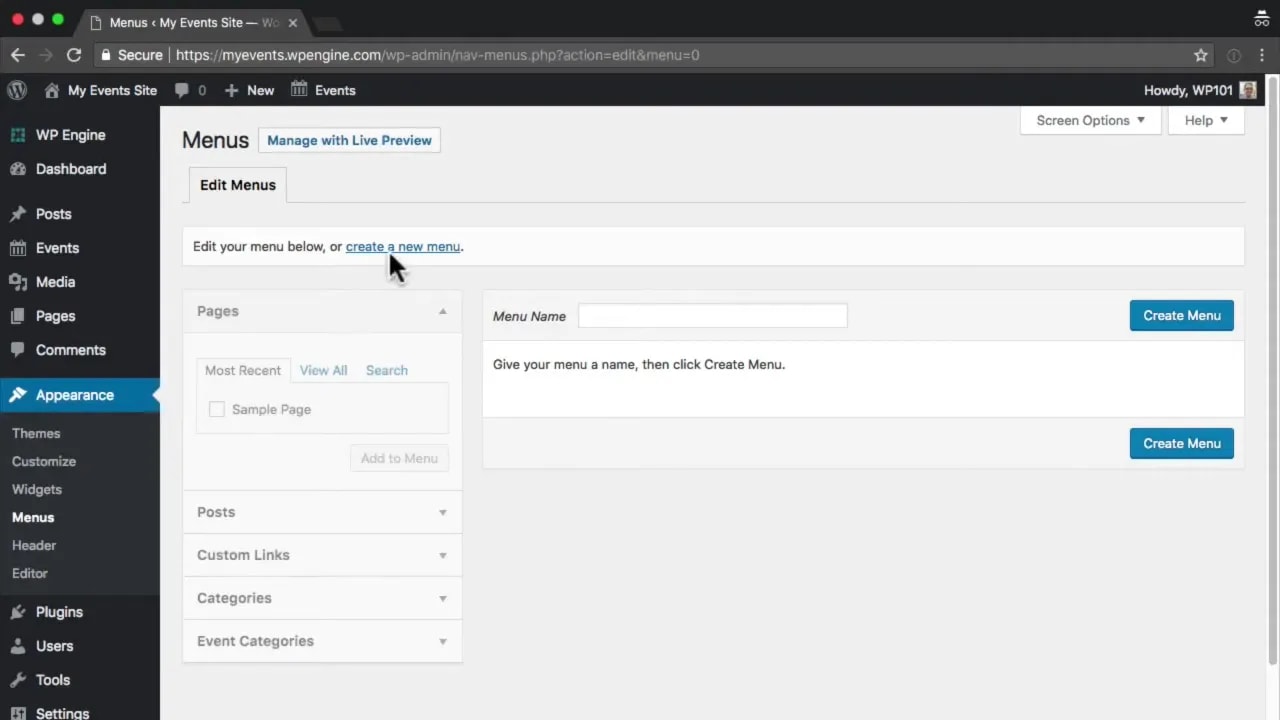
Then open the Custom Links section and add:
- URL: /events
- Link Text: Events
Add the link to your menu, choose the menu location for your theme, and save it.
Once that’s done, people can click the Events item in your navigation and browse the events archive in month, list, or day view. They can also search for events from there.
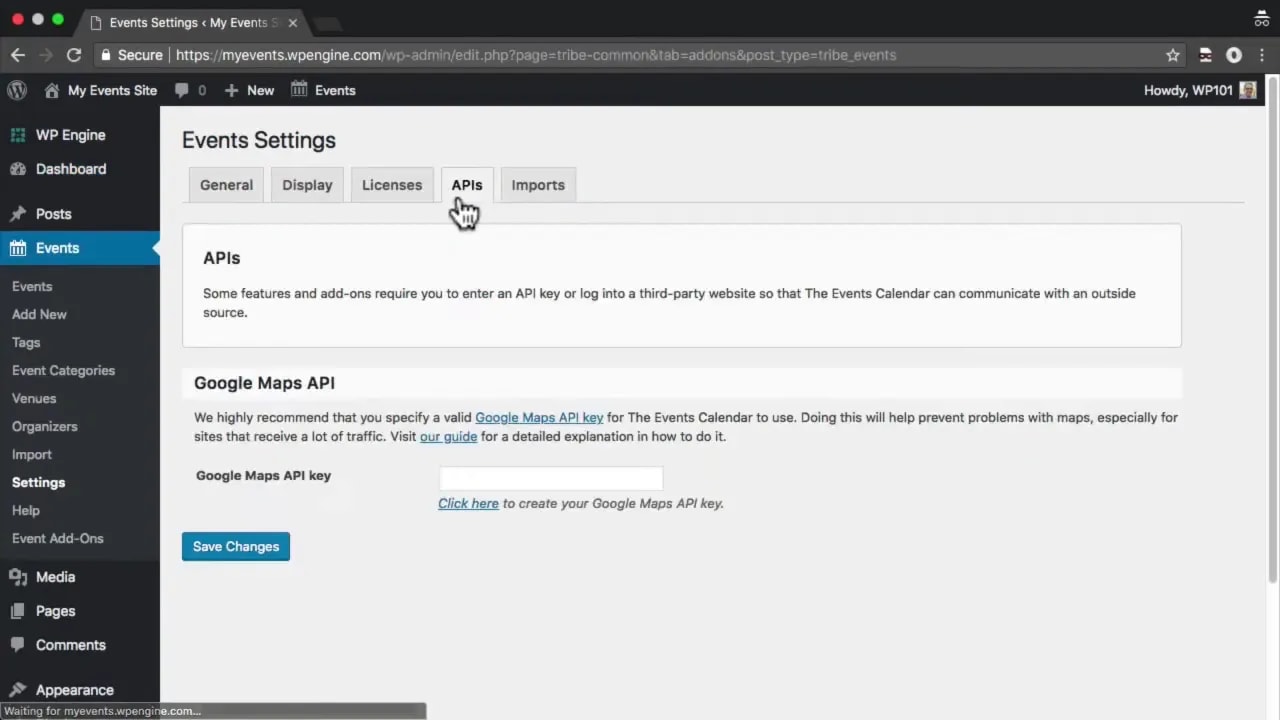
Set up Google Maps for more reliable venue maps
If your site gets a lot of traffic, or if your event maps are not displaying consistently, you should add a Google Maps API key.
In WordPress, go to Events > Settings > APIs and follow the Google Maps API link.
Google may require a billing account and credit card even if your usage stays within the free limits. The key steps are:
- Open Google Maps Platform and click Get Started.
- Select Maps.
- Sign in with a Google account.
- Create a new project for your site.
- Set up billing if prompted.
- Enable Google Maps and generate an API key.
Copy the generated API key and paste it into the Google Maps API field in your Events settings, then save changes.
Restrict the API key to your website
This is an important security step. Inside the Google API Console, set an application restriction so the key only works on your own domain.
If your site uses a subdomain or www, use a pattern like:
*.yourdomain.com/*If your site always uses the root domain without www, use:
yourdomain.com/*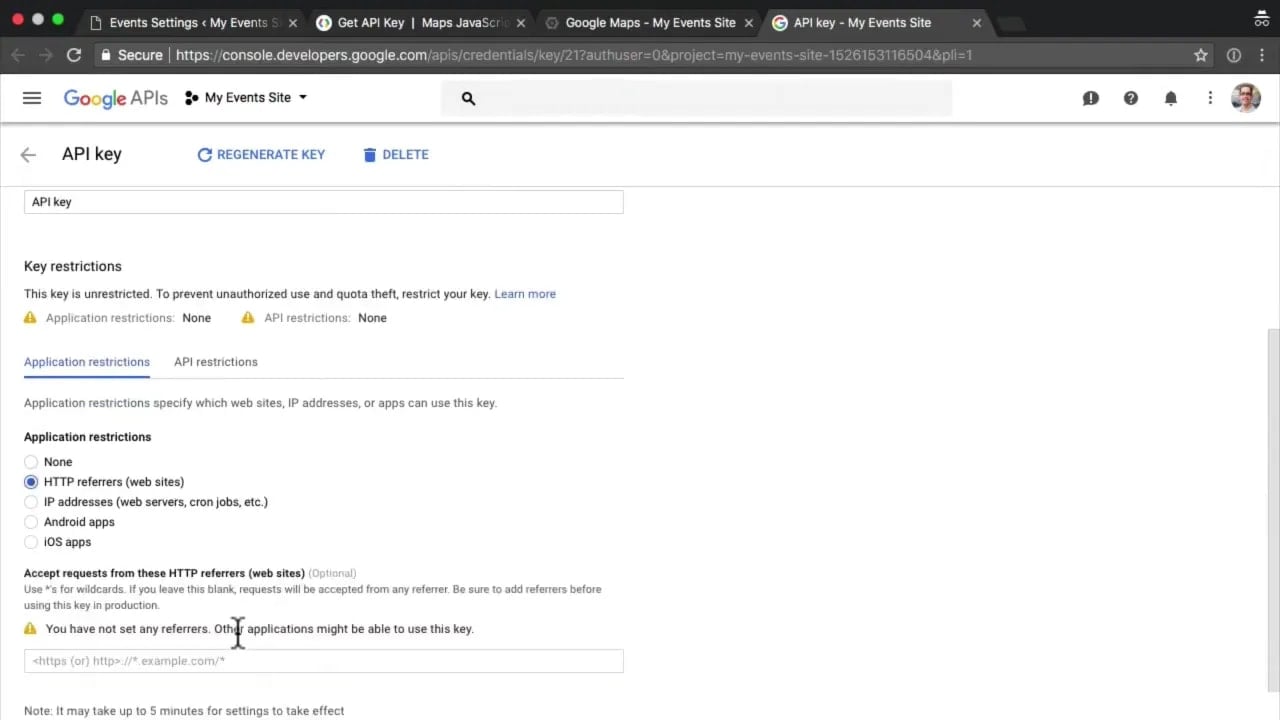
Once that’s in place, your maps should display more reliably on event pages.
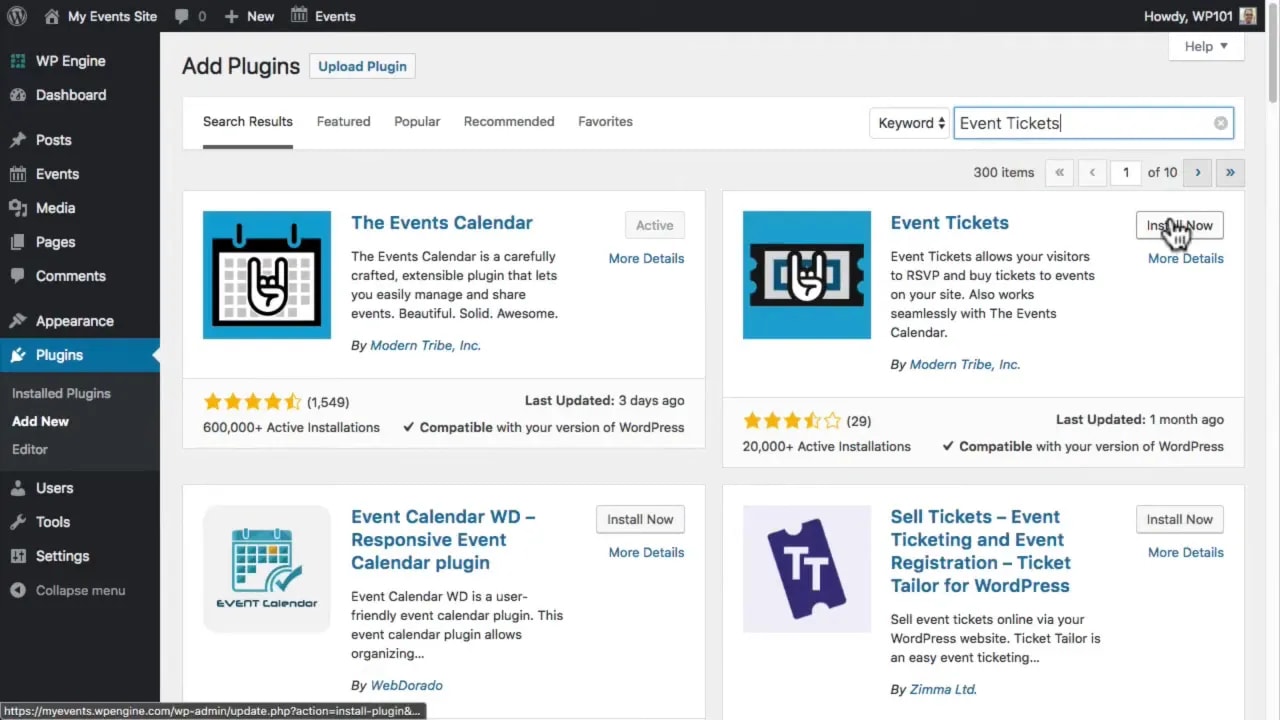
Allow RSVPs with the Event Tickets plugin
If you want people to reserve a spot for an event directly on your site, install the Event Tickets plugin.
Go to Plugins > Add New, search for Event Tickets, then install and activate it.
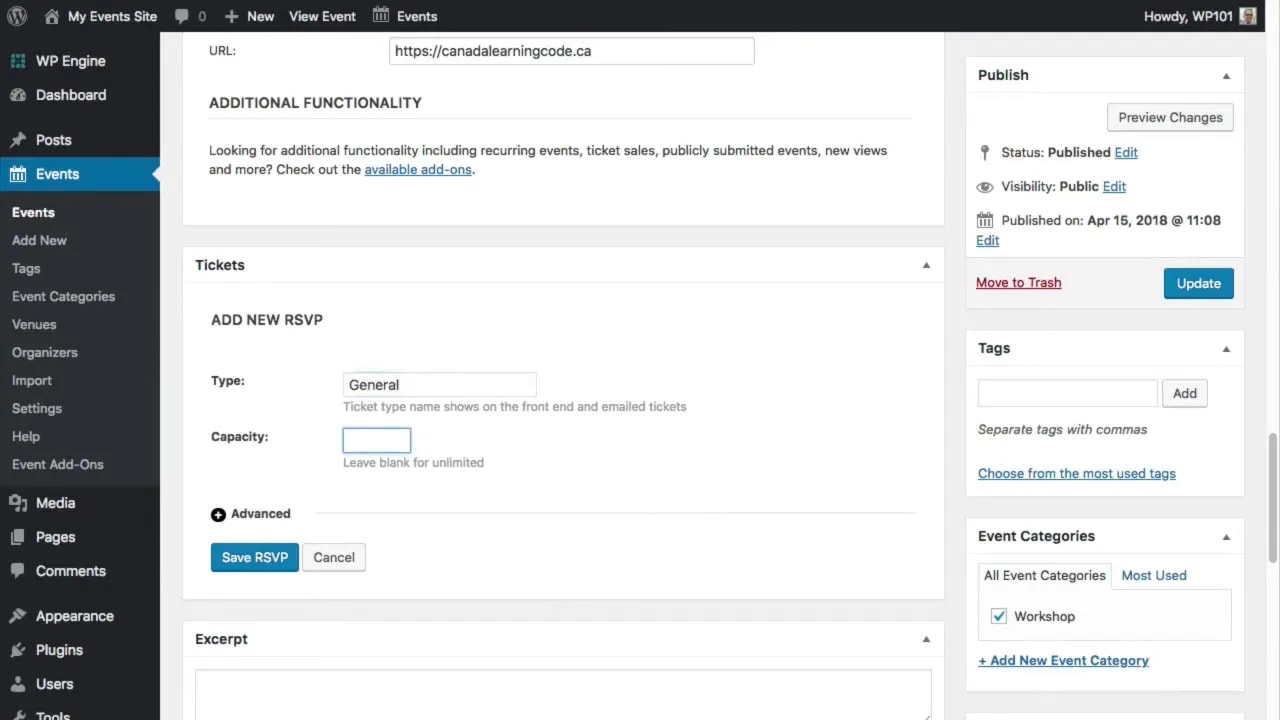
Now edit one of your events and scroll to the Tickets area. Click New RSVP.
From there you can:
- Add a name for the RSVP type
- Set the number of spaces available, or leave it blank for unlimited
- Open advanced settings for a more detailed description
- Choose when RSVPs open and close
Save the RSVP when finished. If you need multiple RSVP types, you can add more than one. For example, you might have a special RSVP option for accessibility seating.
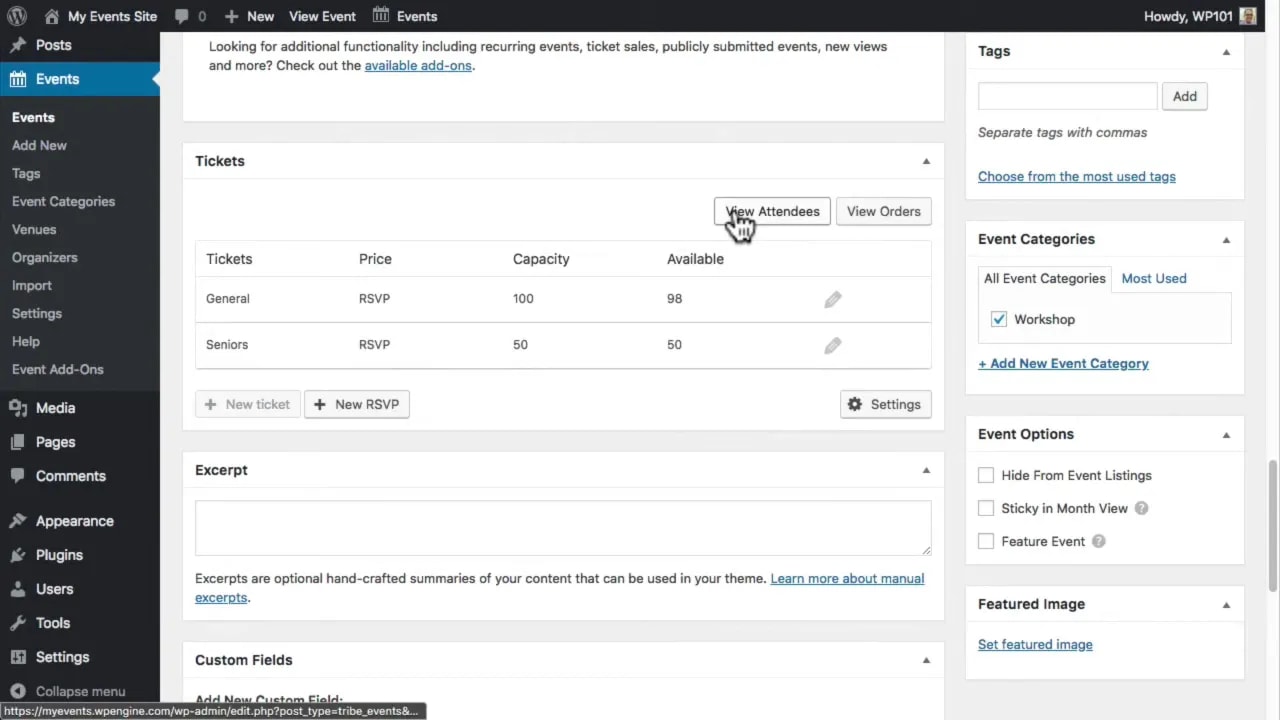
After updating the event, the event page will display an RSVP form near the bottom. People can choose the quantity they need, enter their name and email address, and confirm their RSVP.
To manage responses, edit the event again and scroll down to the attendees section. There you can:
- See who has registered
- Mark attendees as checked in
- Print the attendee list
- Export the attendee list
Sell paid tickets from your own site with PayPal
If you want to take payments for event tickets directly on your site, you can use the same Event Tickets plugin together with PayPal.
This setup is especially useful if you want to keep ticket sales on your own website rather than sending people to an external event platform.
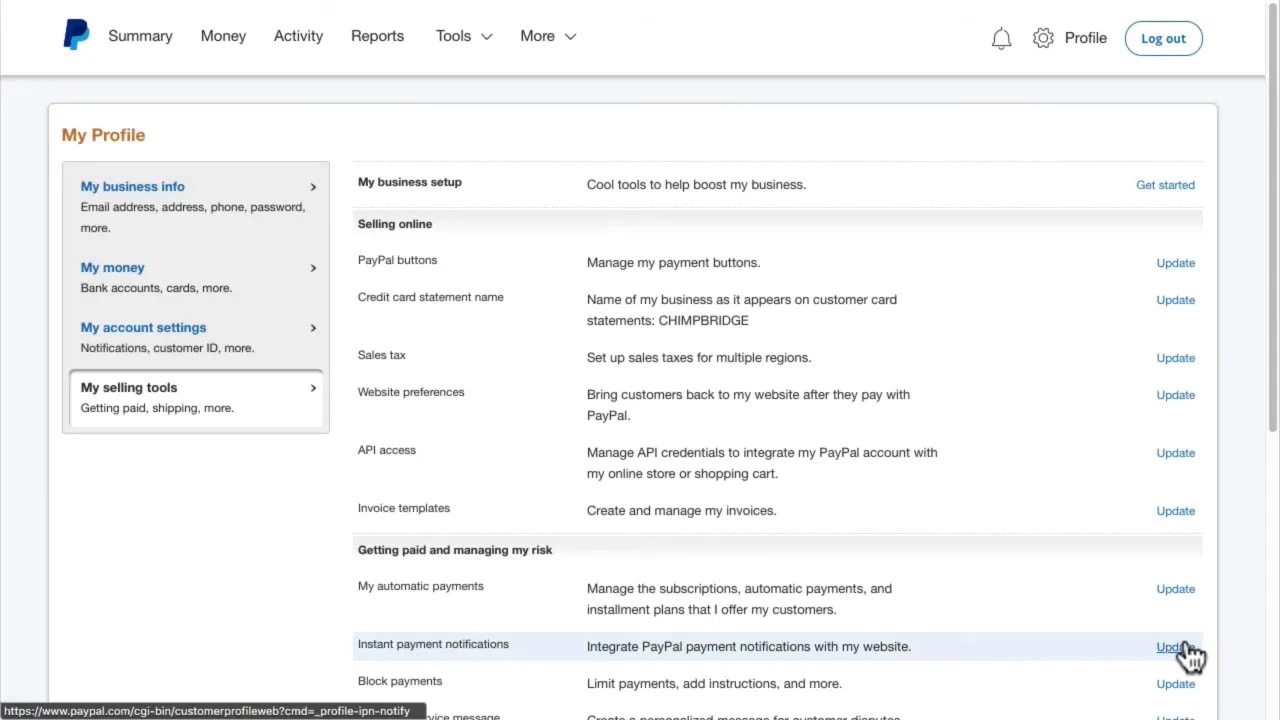
Step 1: Set up your PayPal Business account
You’ll need a PayPal Business account. Once your account is active, log in and go to your profile and selling tools.
Find Instant Payment Notifications (IPN), then enable it and enter your website URL. This allows PayPal to notify your site whenever a new ticket order comes through.
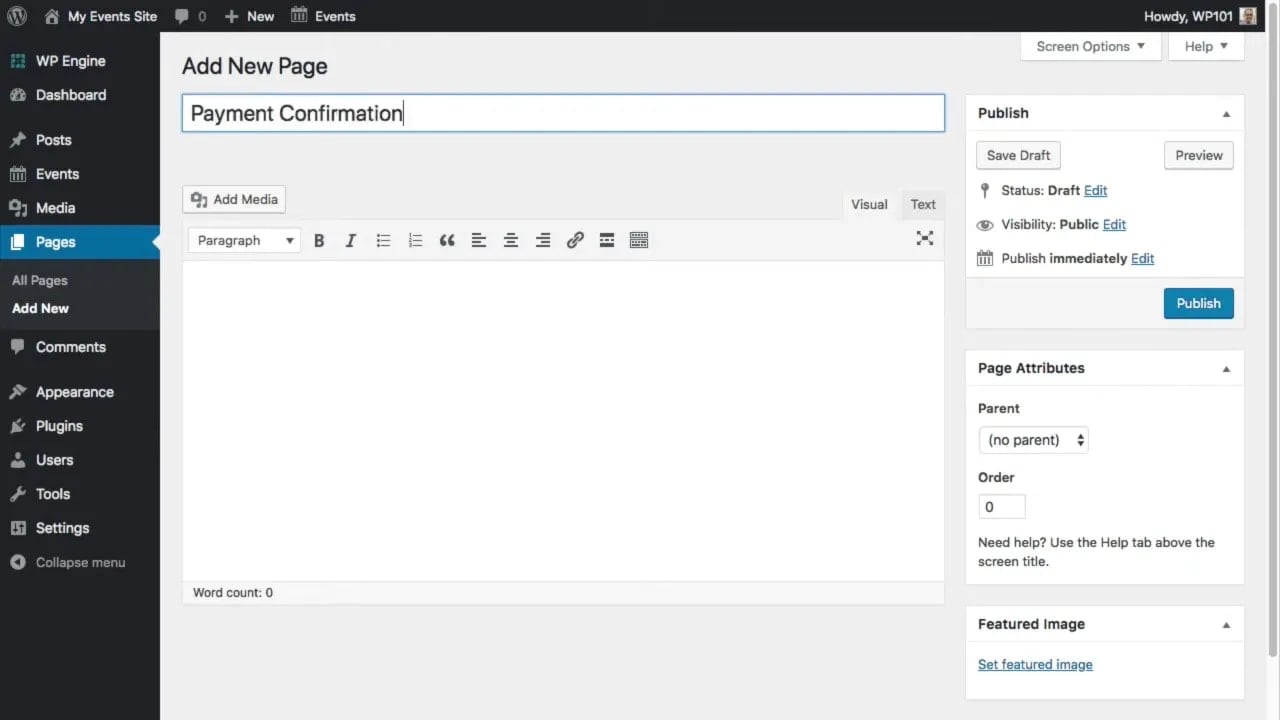
Step 2: Create a payment confirmation page in WordPress
Next, create a new page on your WordPress site called something like Payment Confirmation.
In the content area, add this shortcode:
[tribe-tpp-success]Publish the page. When someone lands on it after completing payment, the shortcode will be replaced with details about their order.
Step 3: Configure PayPal website preferences
Back in PayPal, open Website Preferences and:
- Turn on Auto Return
- Paste in the URL of your new payment confirmation page
- Turn on Payment Data Transfer
- Save your changes
Step 4: Enable ticket payments in The Events Calendar settings
Now return to WordPress and go to Events > Settings > Tickets.
In the Tribe Commerce section:
- Enable the payment option
- Enter your PayPal email address
- Confirm your IPN setup
- Select your PayPal account currency
- Leave stock handling at the default setting to avoid overselling
- Select the payment confirmation page you created
- Review the confirmation email details
Save the changes when finished.
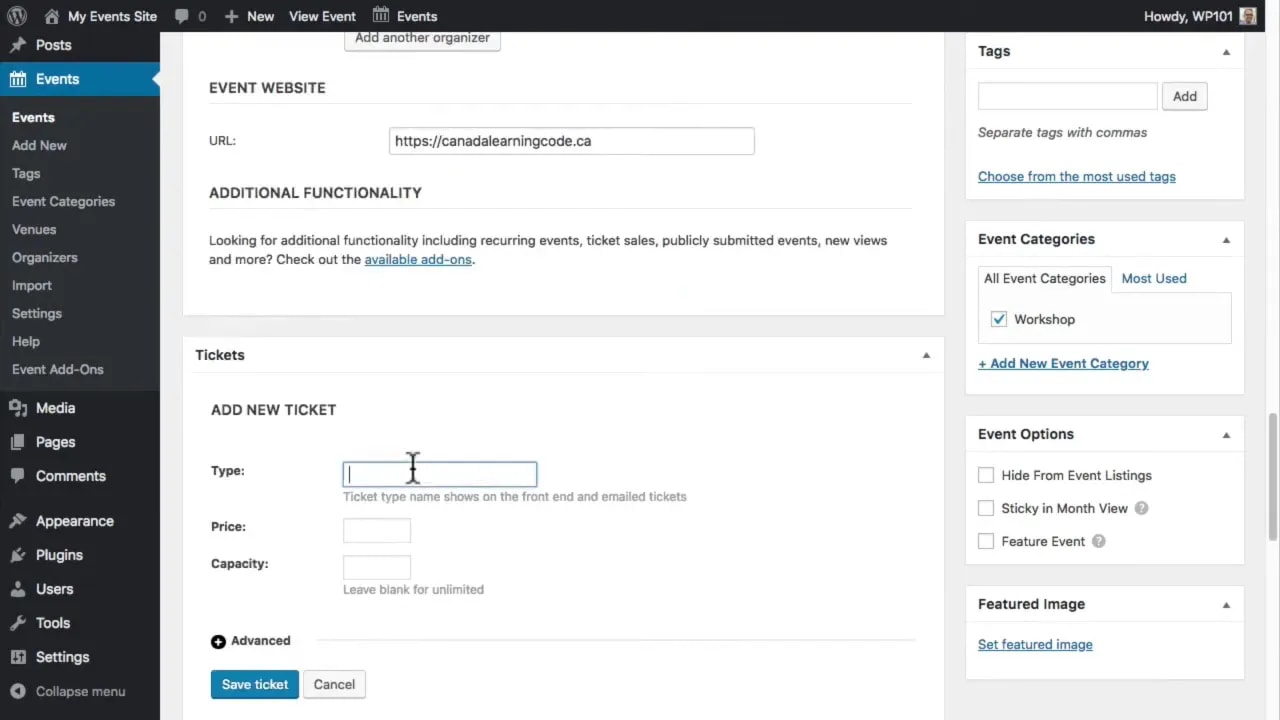
Step 5: Create a paid ticket on an event
Edit an event, scroll down to the tickets area, and click New Ticket. Enter the ticket details, including:
- Ticket name
- Price
- Number available
- Optional sale start and end dates
Save the ticket and update the event.
Now the event page will include a ticket purchase area, and customers can pay using PayPal or a credit card.
You can review ticket buyers by editing the event and opening the attendee list from the tickets section.
If you need more advanced registration features, such as asking additional questions like meal preferences or T-shirt size, the paid Event Tickets Plus plugin is the next step.
Display events anywhere on your site with a shortcode
Your main Events page is useful, but often you’ll want to show selected events somewhere else too, such as:
- At the bottom of an About page
- Inside a blog post
- In a promotion page for a specific event category
For this, you can use The Events Calendar Shortcode & Block plugin.
After activation, you’ll see a new Shortcode option under Events.
The plugin supports a shortcode called:
[ecs-list-events]If you add that shortcode to a page, or use the included block, Elementor widget or Bricks element, it will display a list of upcoming events with the title, date, and a link to each event.
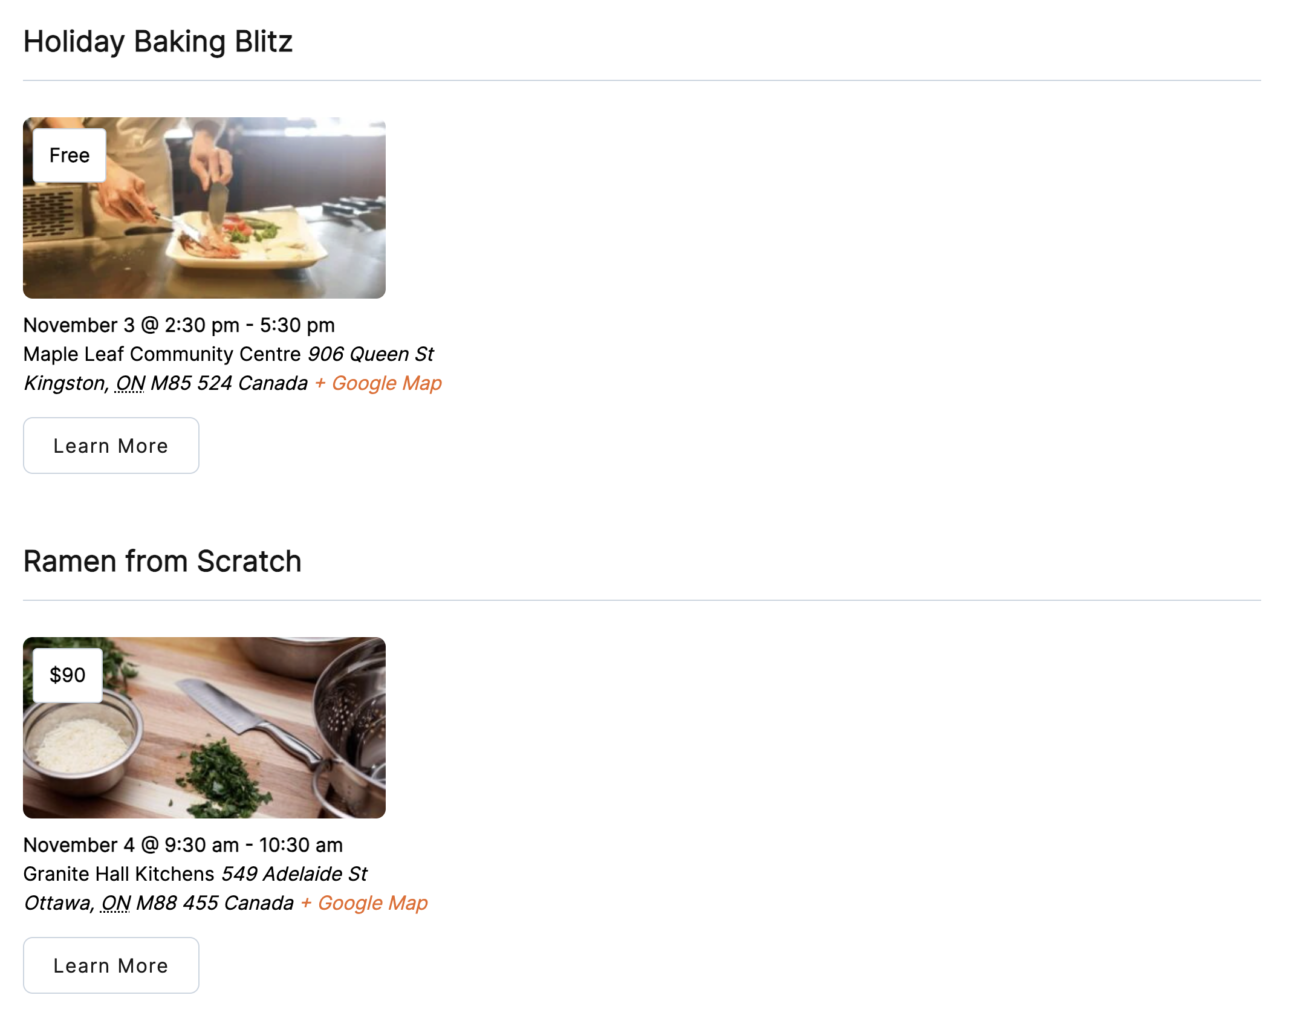
Example: show the next three upcoming events
To list the next three upcoming events at the end of a page, you could add:
[ecs-list-events limit="3"]Example: show only events from one category
To only show events from the workshop category, use:
[ecs-list-events limit="3" cat="workshop"]This is a simple way to promote relevant events in context. For example, a page about training or education could show upcoming workshops without displaying every event on the site.
If you want more ideas for this, this guide on how to display events from The Events Calendar on a page is worth a look.
There’s a lot of different options for displaying the events, such as:
- Compact event views
- Full calendar displays
- Filtering by location
- Showing a single event
- Automatically hiding sold-out events when used with Event Tickets
More examples can be found on the demo site.
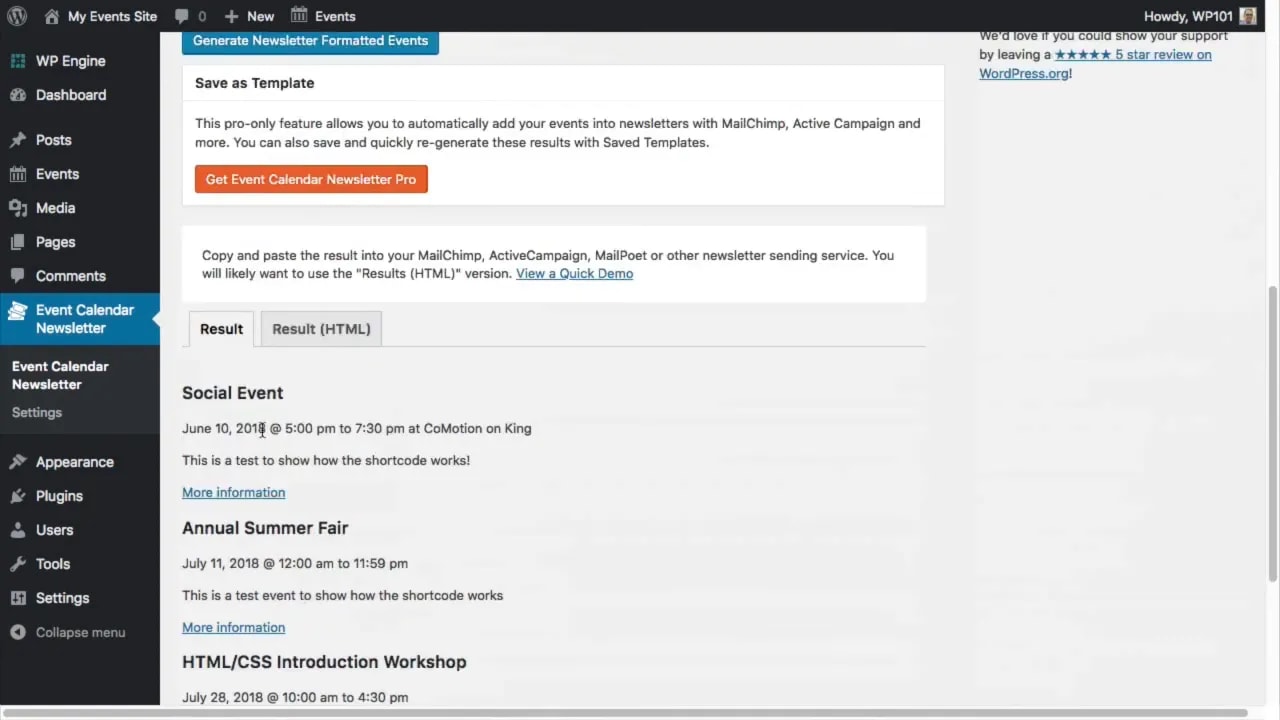
Generate an event newsletter without manual copy and paste
Email newsletters are one of the best ways to promote events, but manually copying dates, times, venues, and links into every campaign takes time and creates opportunities for mistakes.
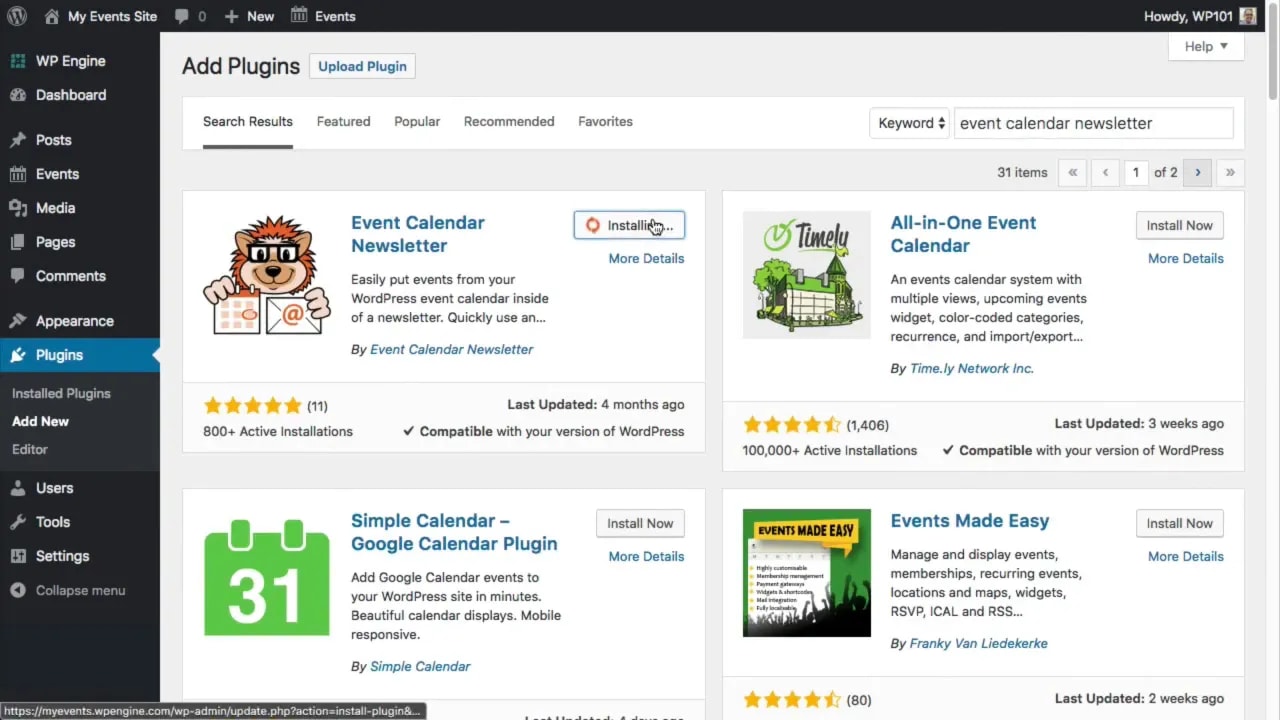
A simpler option is the Event Calendar Newsletter plugin.
Install it from Plugins > Add New by searching for Event Calendar Newsletter. Once activated, open the new menu item in your WordPress dashboard.
From there you can:
- Choose how far into the future to pull events
- Select from existing newsletter layouts
- Create a custom design using only the fields you need
- Generate the newsletter content in one click
Then you can copy and paste those event details into your email marketing platform of choice, such as Mailchimp, AWeber, or ActiveCampaign.
The Pro version adds more designs, saved templates, category and tag filtering, and other advanced options. If your team regularly sends event emails, that can save a surprising amount of time. You can learn more here: Event Calendar Newsletter Pro.
Wrapping up
With The Events Calendar, you can build a solid event publishing system directly inside WordPress. The core workflow is straightforward:
- Install and configure the plugin
- Create events with all the important details
- Add an Events link to your navigation
- Enable Google Maps for better location display
- Accept RSVPs if needed
- Sell tickets with PayPal for paid events
- Promote events across your site with shortcodes
- Generate newsletters to market upcoming events more efficiently
Once these pieces are in place, your WordPress site becomes more than just a place to list event details. It becomes your event hub: discoverable, searchable, bookable, and much easier to promote.