Once set up, visitors will be able to subscribe to your event calendar by email using Event Calendar Newsletter Pro!
If you have not already done so, you'll need to have an event calendar on your WordPress site. You can see instructions for adding an event calendar, which is where you will add your upcoming events.
In this tutorial we'll create a weekly newsletter that goes out every Sunday, and includes all events for the next two weeks. You can modify the settings to match the events and frequency you'd like.
Specifying the Events to Include
Once you have your calendar added and at least one event, go to Event Calendar Newsletter and follow the steps below:
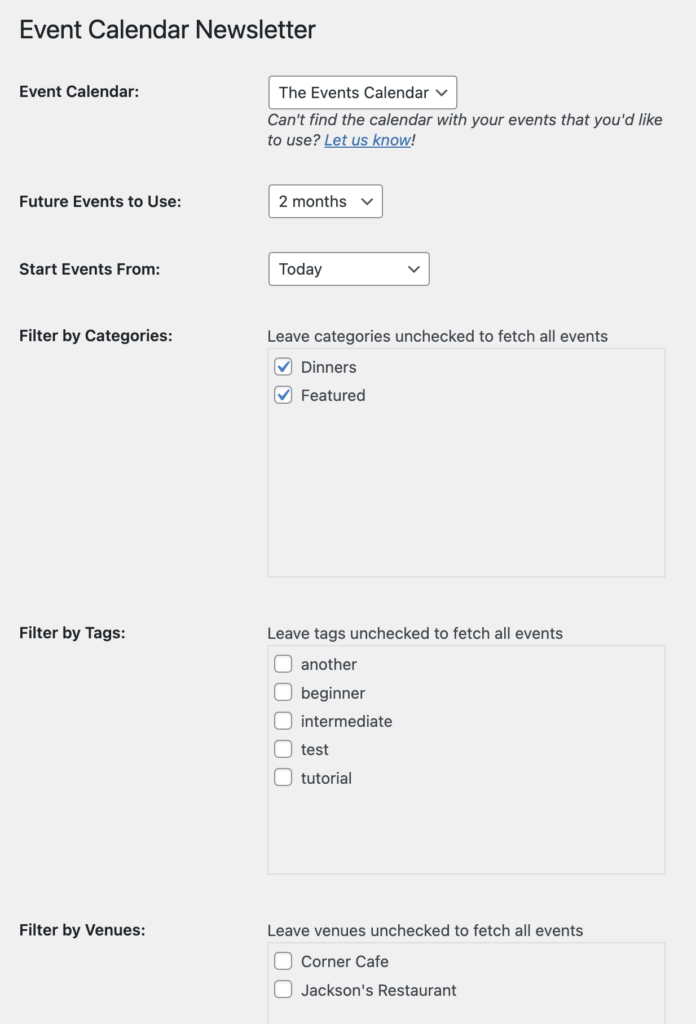
- Select what events you want to include by how far in the future the event is happening and optionally filtering by categories or tags (or leave unchecked to use all events)
- Specify what each event in the newsletter should look like using the Format options. You can include things like the event's featured image, and format the event exactly how you'd like it to look within your newsletters.
- Click Generate Newsletter Formatted Events
You can verify that the correct events are being included in the preview that appears:
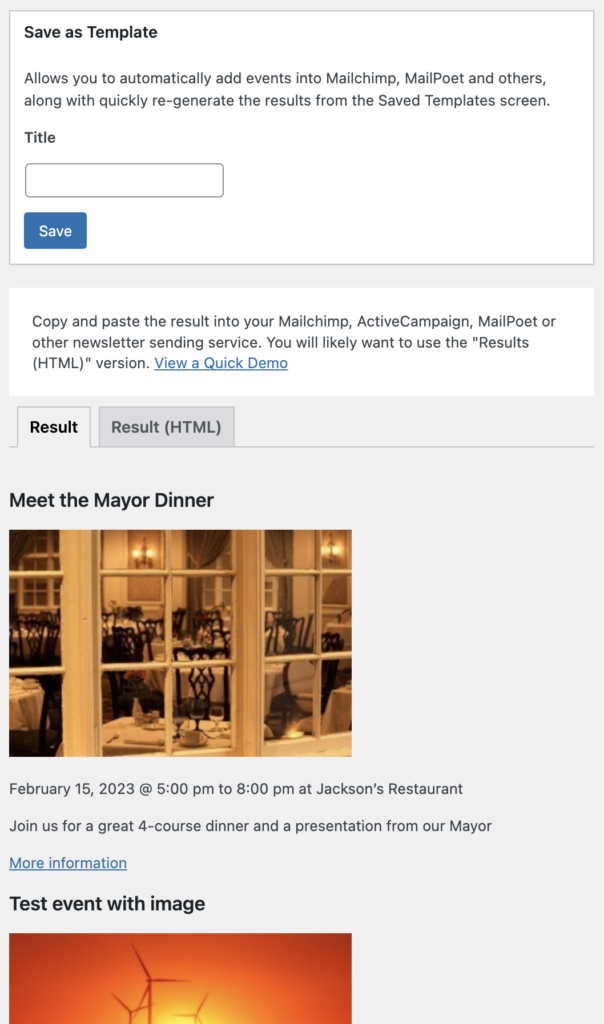
Now you need to save this as a template, which we'll point Mailchimp to:
- In the Save as Template box, enter a title for these events (such as "Upcoming Events This Week")
- Click Save
Sending Upcoming Event Emails with Mailchimp
To send using Mailchimp, you'll need a free or paid Mailchimp account. It's quick and easy to do, and you don't need anyone on your list yet to complete the setup.
Get the Saved Template Feed URL
Go to Event Calendar Newsletter, then Saved Templates. You'll now see the template we just saved:

Click on the box under Feed URL and copy it (Cmd+C on a Mac, Ctrl-C on Windows, or right-click and choose Copy).
Create an RSS Campaign in Mailchimp
Login to your Mailchimp account, then click on this link to start creating a new RSS campaign. Mailchimp sometimes won't show an option to create one if you haven't before, but using this link will take you right to it:

Enter a name for your campaign (internal only for your reference), select your list or "Audience" from the dropdown (if you just created a brand new account, you'll have a default one with just you in it), and click Begin.
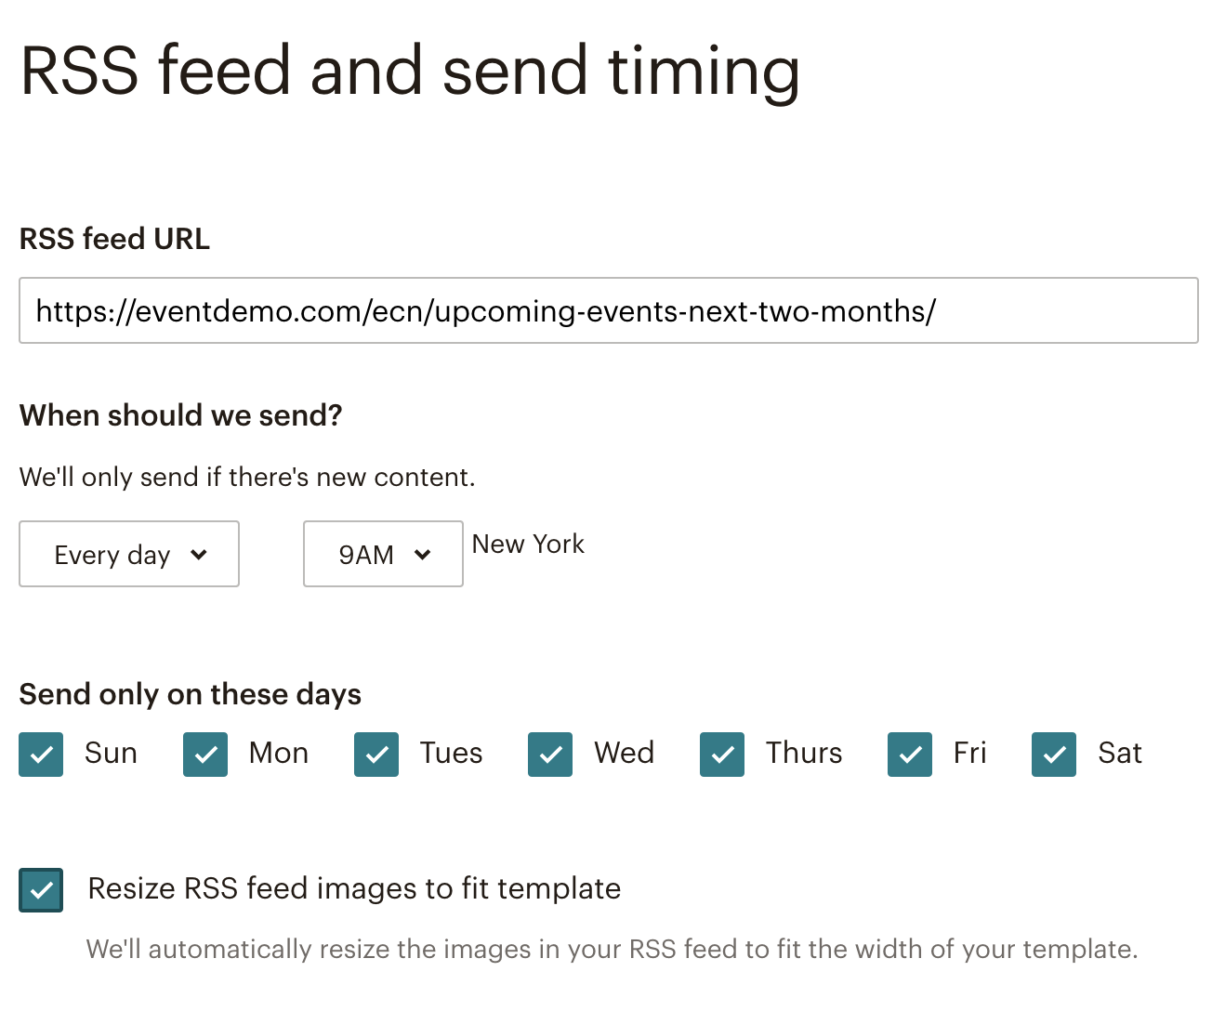
In the RSS feed URL box, paste in the Feed URL of the Saved Template you copied at the beginning of this section. Select "Every Week", the day and the time you'd like to send the mailing. Also check Resize RSS feed images to fit template then, click Next in the bottom-right corner of the browser.
On the next screen, confirm the Audience to send to and click Next.

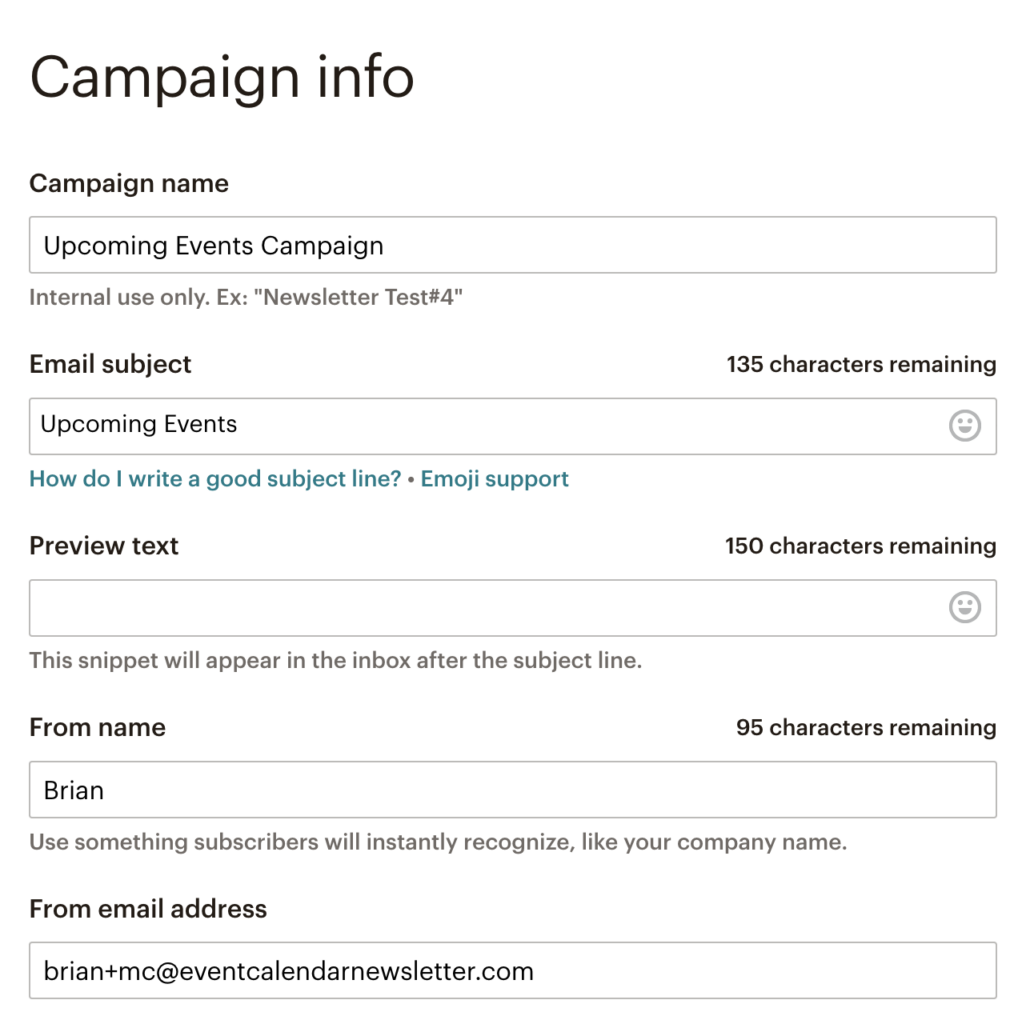
You can now confirm your campaign name, and you can change the subject to something like "Upcoming Events":
You can now choose any design you would like. While there are RSS campaigns to choose from, I'd recommend going with something like Simple Text (the last one) which is easiest to edit without removing a bunch of default content.
Once in the editor, edit the content to add an introduction if you'd like, then add a new Text block with the following content:
*|RSSITEMS:|**|RSSITEM:CONTENT_FULL|**|END:RSSITEMS|*
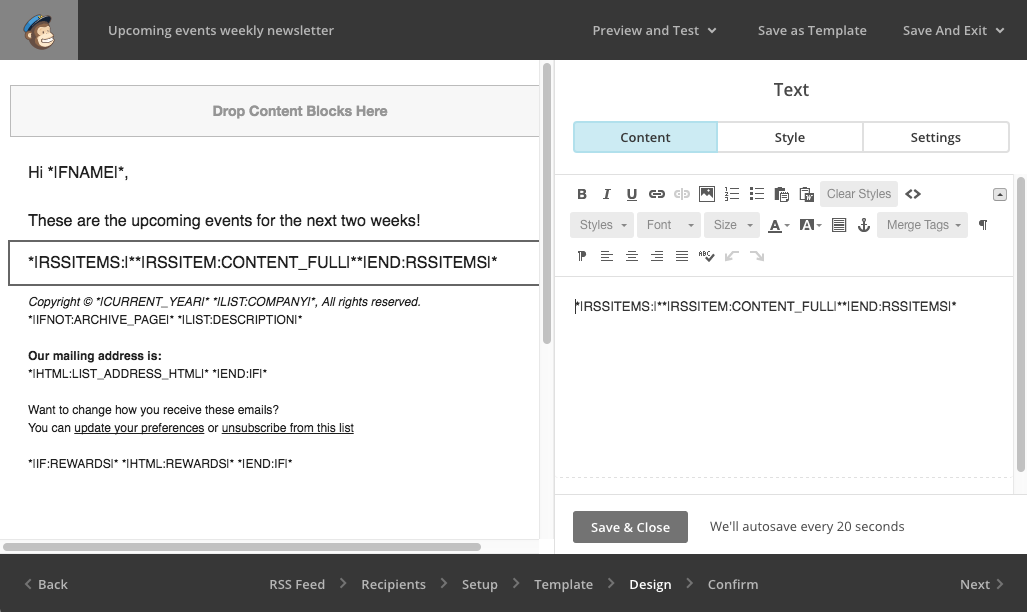
Click Preview and Test at the top then click Enter Preview Mode to see that it's pulling in your events correctly. If the events appear but don't look right, you may need to right-click in the text editor and choose 'Paste and Match Style' to avoid any extra formatting being added.
![]()
You can also click on the Enable live merge tag info toggle to see exactly how it would look to a specific subscriber.
Last but not least you can also click Preview and Test then Send test email to see how it looks on your desktop and mobile email programs.
Now close the preview mode, click Next in the bottom right corner, confirm everything looks good and there are no errors, then click Start RSS.
That's it! You can test it out for a week or two and make sure the Sunday emails look how you want and include the events you want, then start adding people to your mailing list.
Getting People on your Mailing List
There's a bunch of ways to get people on the list to hear about your upcoming events!
Add People Manually
You can use old fashioned pen and paper or collect business cards of people who attend your events or visit your business, then manually add them to your list.
If you have an existing database of people who have given you permission to email them about your upcoming events, you can also import them into a list.
Adding a Subscription Form on Your Website
There are a number of ways you can add a subscription form so visitors can subscribe directly from your website.
- Create an embed form and paste it in the Text tab of a WordPress Page or Post
- Use a plugin like Easy Forms for Mailchimp or Mailchimp for WordPress and optionally the Mailchimp Top Bar to add a subscribe form to every page
- Use something more advanced like OptinMonster to configure smart popups and test different subscription form placements
There are many more WordPress plugins for Mailchimp that you can try to find the one that works best for you.
Other Options
While this example sends a weekly newsletter with certain events, you might want to only send new events each week. Or maybe even set up multiple Campaigns where one reminds them of events for the coming week and another sends new events as you add them to your calendar. Event Calendar Newsletter Pro gives you the flexibility to set up your newsletters the way you want!
Sending Only New Events
The example above will include the same events more than once, ie. an event 2 weeks from now will also be included in next week's newsletter. If you only want to send the same event once to your list, you can change the preference to do so. You can also override the settings for each saved template.
Sending Only Events People Are Interested In
You can set up a more advanced system where people are added to Mailchimp Groups based on their preferences, which they can update through the 'update preferences' link in your emails or through the sign up form. This lets people hear only about the events they want to know about, such Arts & Culture events but not any Nature-related events.
When adding events, specify the category of that event. Then, create a Mailchimp Group for each category that people can choose from. You'll also need to create a saved template like we did above but this time, check off the category or categories for the group:

Then in your template, add a new Text block with the following:
*|INTERESTED:Event Categories:Arts and Culture|*
*|FEEDBLOCK:YOUR-FEED-URL|**|FEEDITEMS:[$count=100]|**|FEEDITEM:CONTENT_FULL|**|END:FEEDITEMS|**|END:FEEDBLOCK|*
*|END:INTERESTED|*
Replacing Event Categories with your Group Title, Arts and Culture with the Group Name, and YOUR-FEED-URL with the Feed URL of your Saved Template. You can see how these conditional merge tags work in Mailchimp's documentation.
Questions?
Get Started with Event Calendar Newsletter